We decided to build our mantle with mitered corners and a French cleat. When the all of the sides have been cut at 45 degrees it gives you that solid beam look without having to deal with the weight or the price of a large piece wood. The French cleat is a great mounting option and is easy to install.
We were also able to build the mantle easily and cheaply because we used a prefabricated unfinished solid wood panel board for all our sides. These project boards are different then plywood. They are solid wood slats that have been glued at the sides, rather than thin layers of wood glued on top of each other. Because it comes from a factory it is usually very square and flat, which is great for cutting wood with precision.
Supplies We Used To Build Our Mantle
- 2×4 Studs
- Project Panel Board
- Wood Glue
- Pocket Hole Screws
- 220 Grit Sand Paper
- Brad Nails
- Wood Filler
- Masking Tape
- Abrasive Pad
- Odie’s Oil
- Creative Color “Titanium White”
Tools We Used To Build Our Mantle
- Circular Saw (Possible to only use only circular saw and to cut 45 degrees angles, but difficult to get right)
- Table Saw
- Miter Saw
- Drill
- Brad Nailer
- Pocket Hole Jig
- Clamps
- Orbital Sander
- Planer (definitely not needed but nice to have)
- Level
Step 1- Cut Your Mantle Sides From Panel Board
The dimension for our mantle is 66″ long, 4.75″ tall, and 6″ deep. The project panel board we purchased to make this mantle was 24″ wide and 72″ tall.
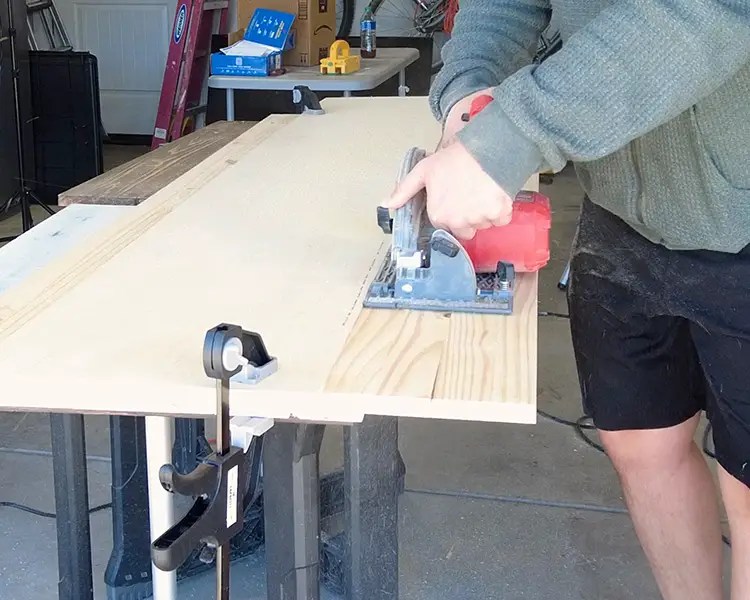
The first step we did was cut our strips off the panel board. We cut 2 pieces that were 6″ wide, and 2 pieces that 4.75″ with a circular saw. The 6″ pieces would be the top and bottom. The 4.75″ pieces would be the front and sides.
We could of made the sides just from the cut offs, but it seemed easier just to cut the extra 4.75″ strip and make the sides from that.
To make sure the cut was straight we clamped a piece of ply wood with that had a straight edge to follow. It is important that all your pieces are straight!
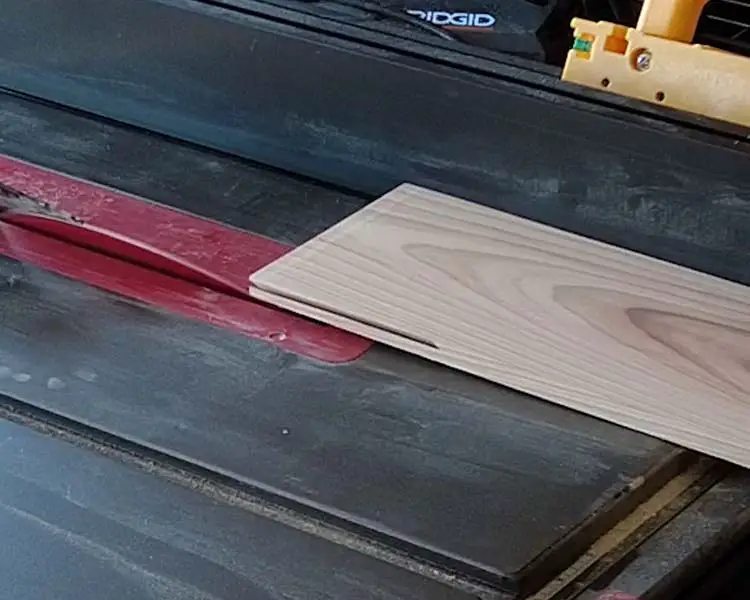
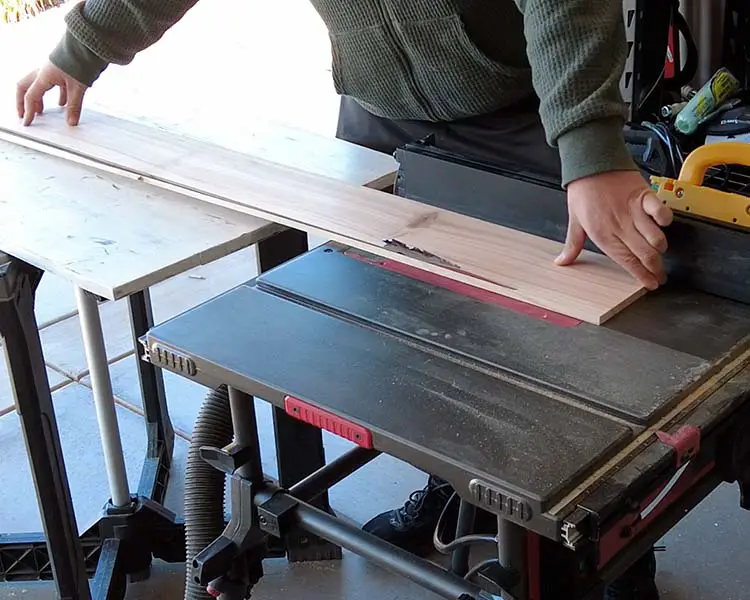
Step 2- Cut 45 Degree Angles On Sides Using A Table Saw
This is were a table saw comes in handy. We set our table saw to cut our pieces edges to 45 degrees. Actually, we followed a tip and cut them slightly more to 44.7 that way there is a gap and the glue will flow inward. However, After going through the glue up, I feel it would have been way better if we had just cut the pieces to 45 degrees exactly.
To make sure our cuts were exactly where we wanted them, we did some test cuts and checked them with a combination square.
To makes sure we cut our pieces right on the edge. We started out a little further then we thought, then slowly adjusted the fence in until we were right on the edge.
Once we were right on the edge we cut the 2 6″ pieces (top and bottom) on one side, and the 4.75″ pieces (front and sides) on both sides.
Step 3- Cut Remaining Sides On Miter Saw
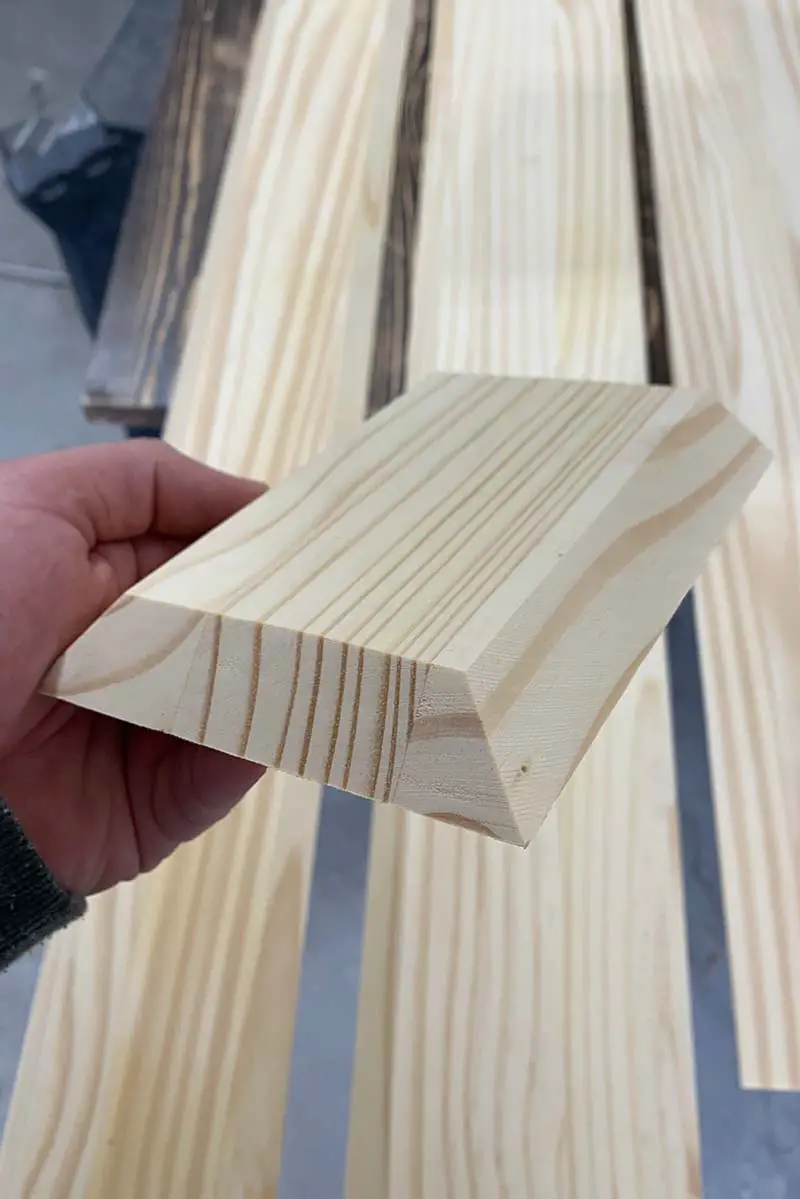
We then cut the pieces down 3 pieces to 66″ long (the two 6″ strips and one of the 4.75″ strips) on the miter saw using a 45 degree angle on both sides.
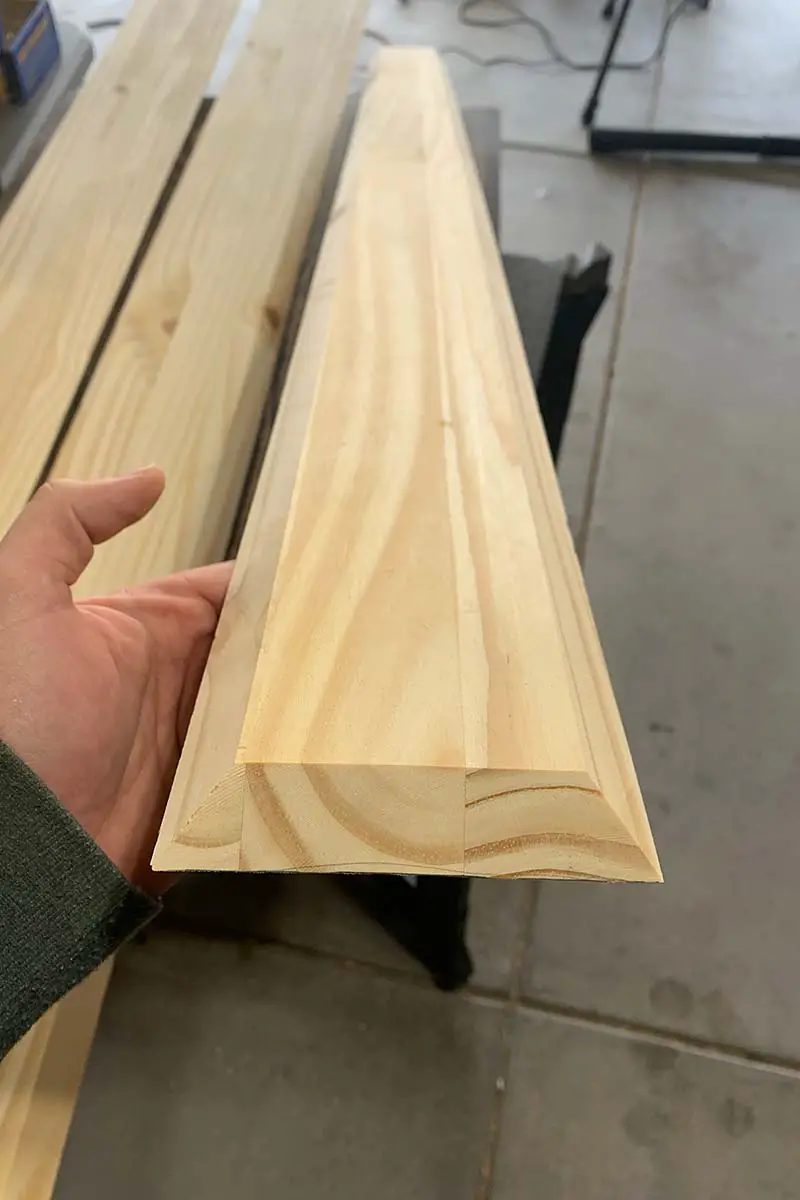
Then cut with the second 4.75″ strip, we cut off 2 pieces that were 6″ at a 45 degree angle.
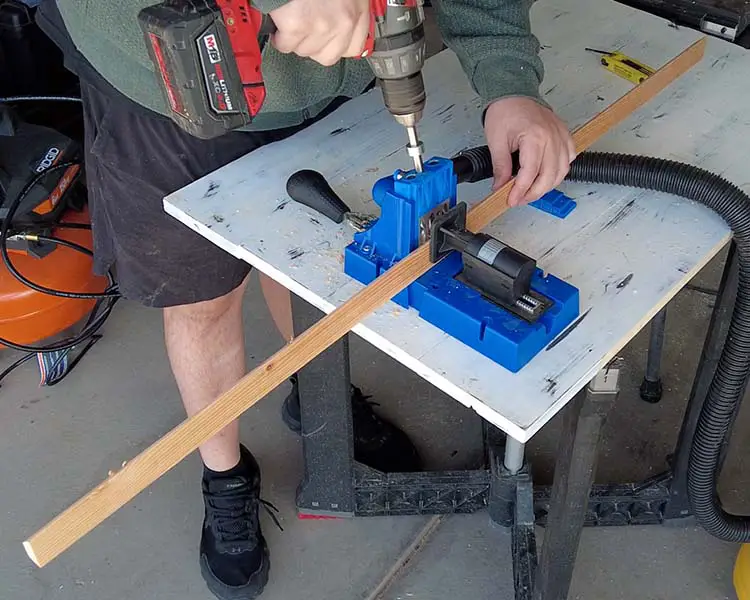
Step 4- Add A French Cleat
A French Cleat is a super nice mounting system for hanging things on walls. They are very simple to make too! All you need to do is cut a strip of wood in half at a 45 degree angle. One half will mount to the wall and the other will mount to your mantle.
For our cleat we used a scrap strip of wood we had left over from making our wood slat barn doors. The strip of wood was 1.5″ wide and we cut it down to 48″ long. We didn’t want to make it the full length of the mantle because we wanted to have the ability to shift the mantle left and right to get it perfectly center when mounting.
We cut the strip of wood perfectly down the middle at 45 degree angle, and then added pocket holes to the side that we where mounting to the mantle. You can just glue it, but pocket holes make it a lot easier.
We then added glue to the bottom of the French cleat and screwed it into place using pocket hole screws to the center of the top piece of our mantle. Making sure that the back of the cleat was flush with at the back and the angled edge was facing the inside.
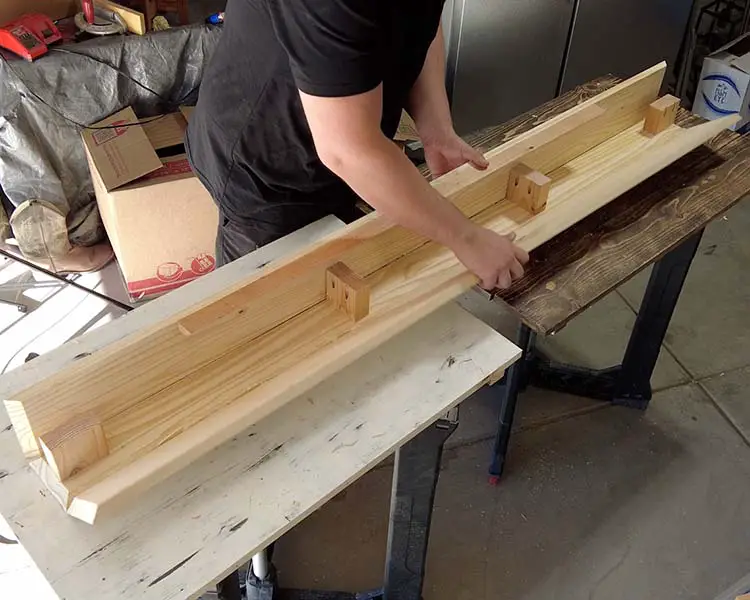
Step 5- Adding Supportive Blocking
Adding this blocking made it easier to nail and glue this mantle together. The blocking acted as a stop, making sure that top and bottom pieces would be flat and the corners wood come to a point because the pieces would be at 90 degrees from one another.
If we didn’t do this then it is possible that the mantle top and bottom pieces could have sloped inward. Especially because we didn’t cut at a perfect 45 but slightly sharper. This one of the reasons why I wish we had cut our pieces to a perfect 45 instead.
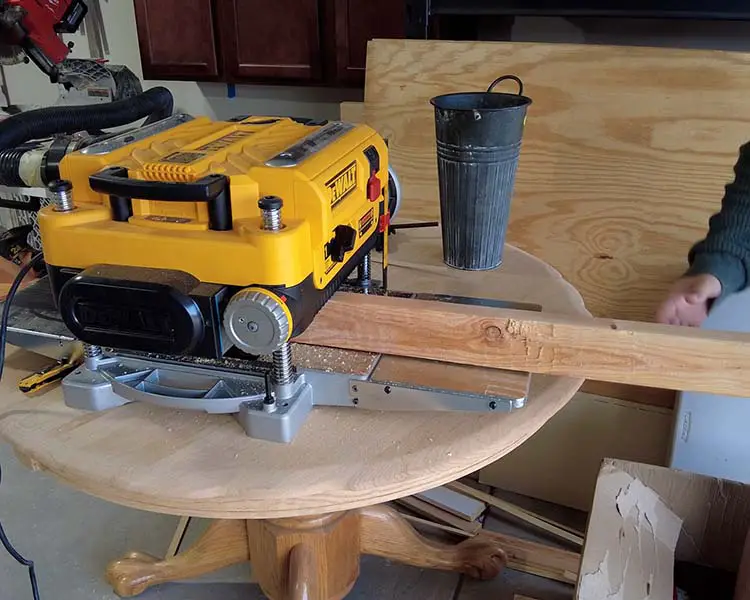
The blocking needed to match the inside dimension perfectly in order for the to work properly. To do this we used a planer, to shave off 1/32 of a inch at time until our 2×4 was the exact same as the inside width. You can also use a table saw to do the same thing.
We the cut the support blocks with the miter saw. They didn’t need to be very long, just long enough to add support when gluing the mantle together. We also want to make sure they weren’t too long and interfered with the French cleat.
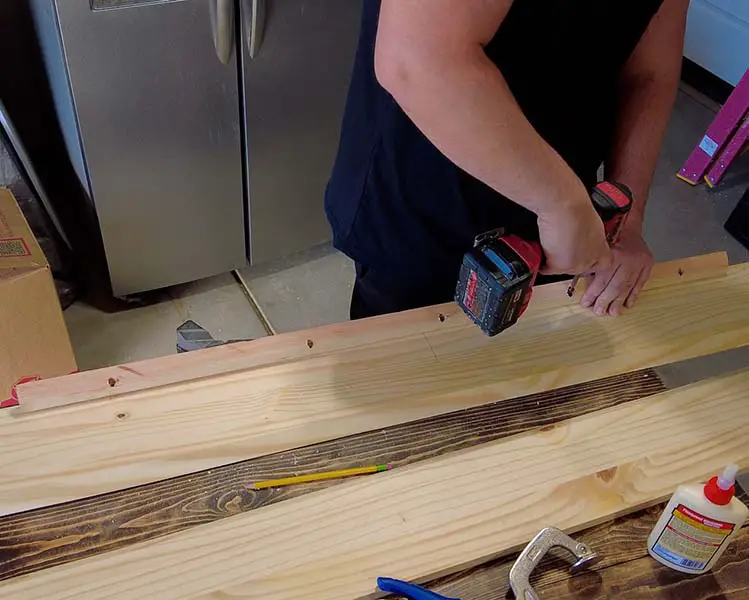
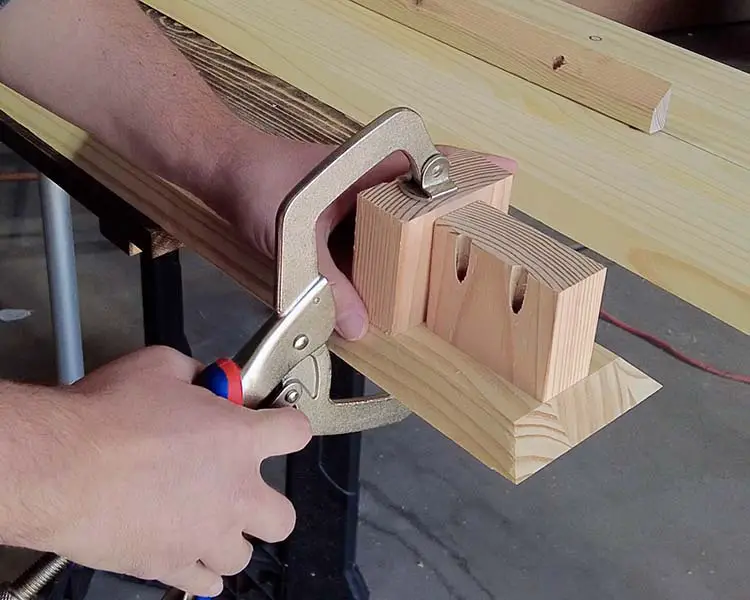
After they blocks were cut we added pocket holes to them, and screwed them in place on to the front piece of our mantle. To hold the blocks steady and make sure they didn’t shift when screwing them in, we used a face clamp.
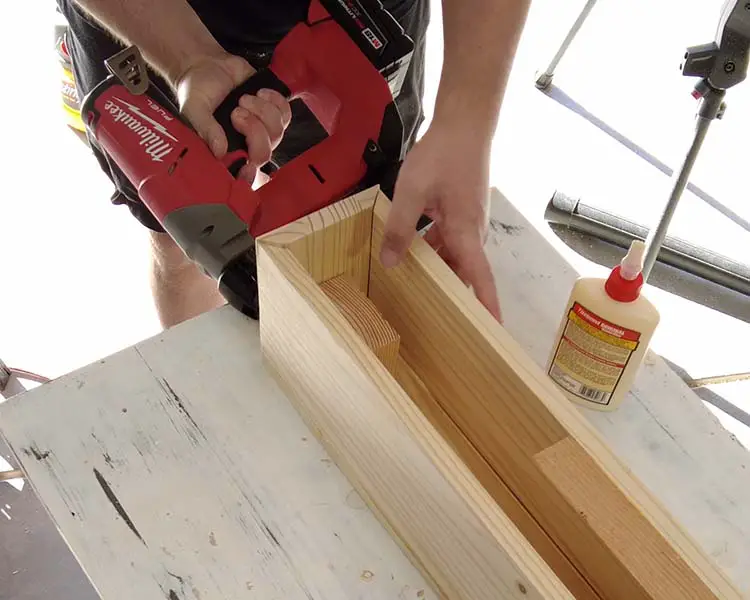
Step 6- Glue & Nail Mantle Together
The first thing we did was add masking tape to the corners. This helps when you roll the pieces together and prevents most of the glue squeezing out , if tight.
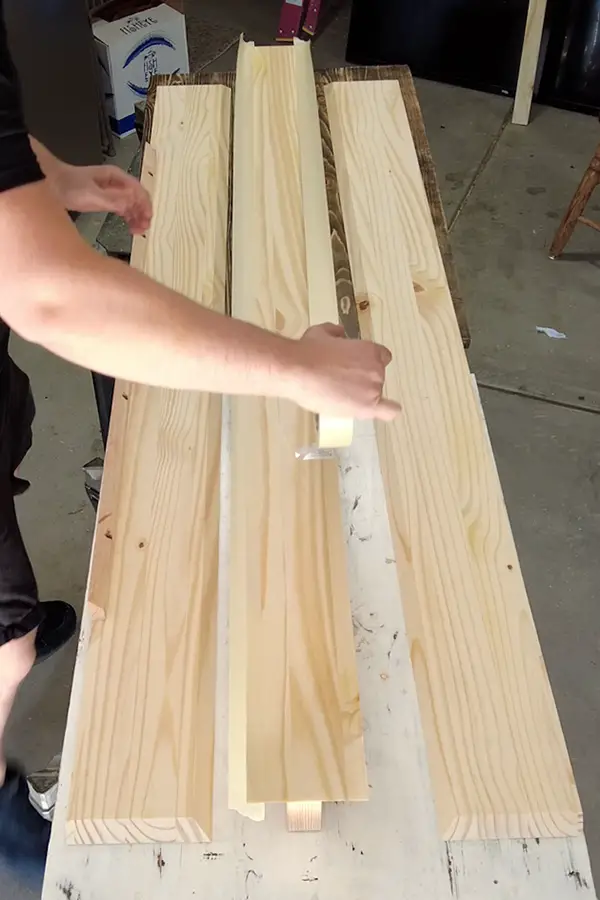
We then added a good amount of glue and rolled the long faces of the mantle together.
After the the long pieces were place, we add the small side pieces. First by adding glue, and then nailing into place with an 18ga brad nailer, but a 23ga pin nails may have been better.
We didn’t need to use clamps yet the corners were meeting up nicely, and the faces were standing up on there own.
In some spots along the length of the mantle the corners weren’t meeting tightly. Probably because the wood faces had been left in my garage over a couple nights and had a little time to warp. To get the corners to meet tightly, I clamped them together and put a nail in that location.

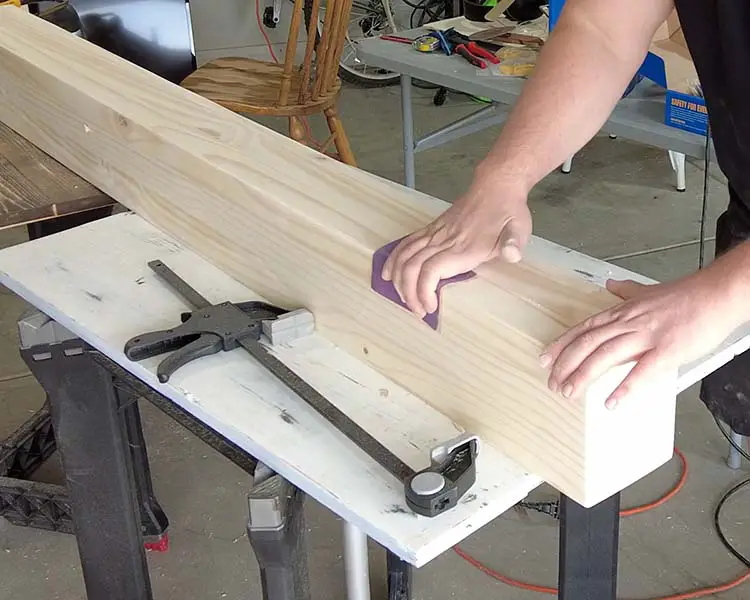
Step 7- Wood Fill And Sanding
Try as you might you are likely going to get a gap here or there, and you will also need to cover up your nail holes. That is were the wood filler comes in!
First we gave a light sanding to get rid of any glue residue then we added wood filler to all our cracks and holes.
We used a combination of a orbital sander and hand sanding to get our mantle smooth. We knocked off all the sharp corners and gave the mantle a slight round over.
Step 8- Adding Natural Wood Finish Odie’s Oil And Titanium White Pigment
We wanted a natural wood look for our finish so we decided to go with Odie’s Oil, which is not toxic and food safe. Not that matter for a mantle too much.
The problem with using Odie’s Oil on this cheaper soft wood is that it adds a lot of yellow tint to the wood, and we wanted something more light. To do this we added an Odie’s product called Creative Colors.
By adding “Titanium White” to our Odie’s Oil it seemed to get rid of all of that yellow tint. It also made the wood look slightly brighter then it did when it was unfinished.
We mixed in about a teaspoon of Titanium White to 1-2 once of the Odie’s Oil in a bowl and rubbed it into the mantle with an abrasive pad.
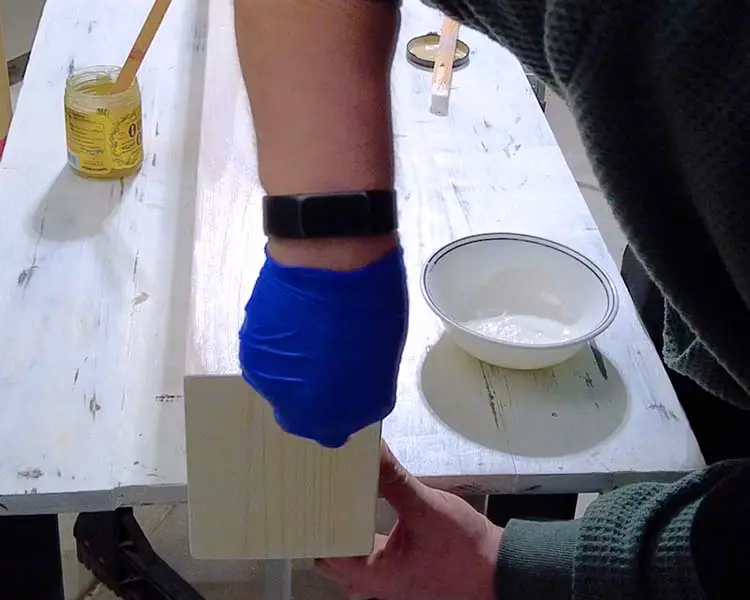
After we let the oil sit for 10 minutes, we rubbed it off vigorously with a rag.
Step 9- Mount Faux Beam Mantle With French Cleat
First step to mounting is finding center on you wall and marking it. If you are mounting to studs you are then going to mark them out as well. We did not need to mark out our studs because we built our fireplace wall so we could mount our mantle anywhere and not think about studs.
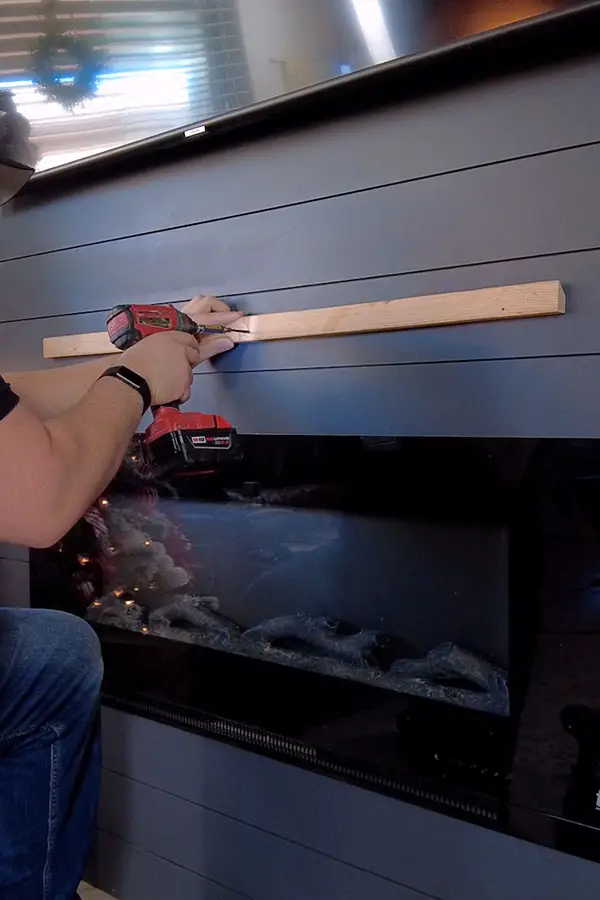
The next step is to pilot out some hole on the wall mounting have of your French cleat, wherever the studs will be.
Attach the cleat with a screw in the center (or as close as you can get). Making sure the angle slopes to the wall, this is what is going to pull the mantle in tight.
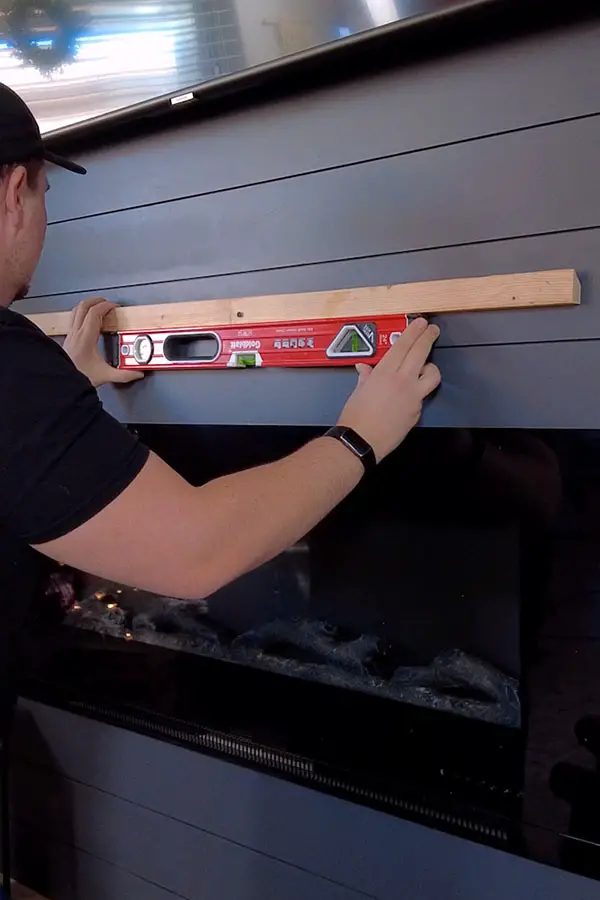
After you have your first screw in you can put in the others. Use a level and ensure your are mounting your mantle level.
The last step is place the mantle on the cleat. If you want to secure your mantle you can put a screw or two up and through the bottom and into the cleat. However, the cleat does a great job holding everything in place by itself, so we did not do that.
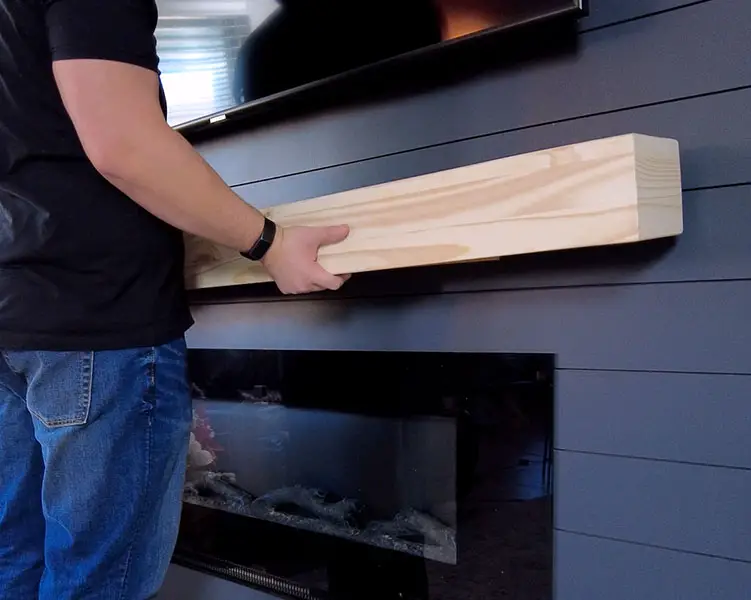
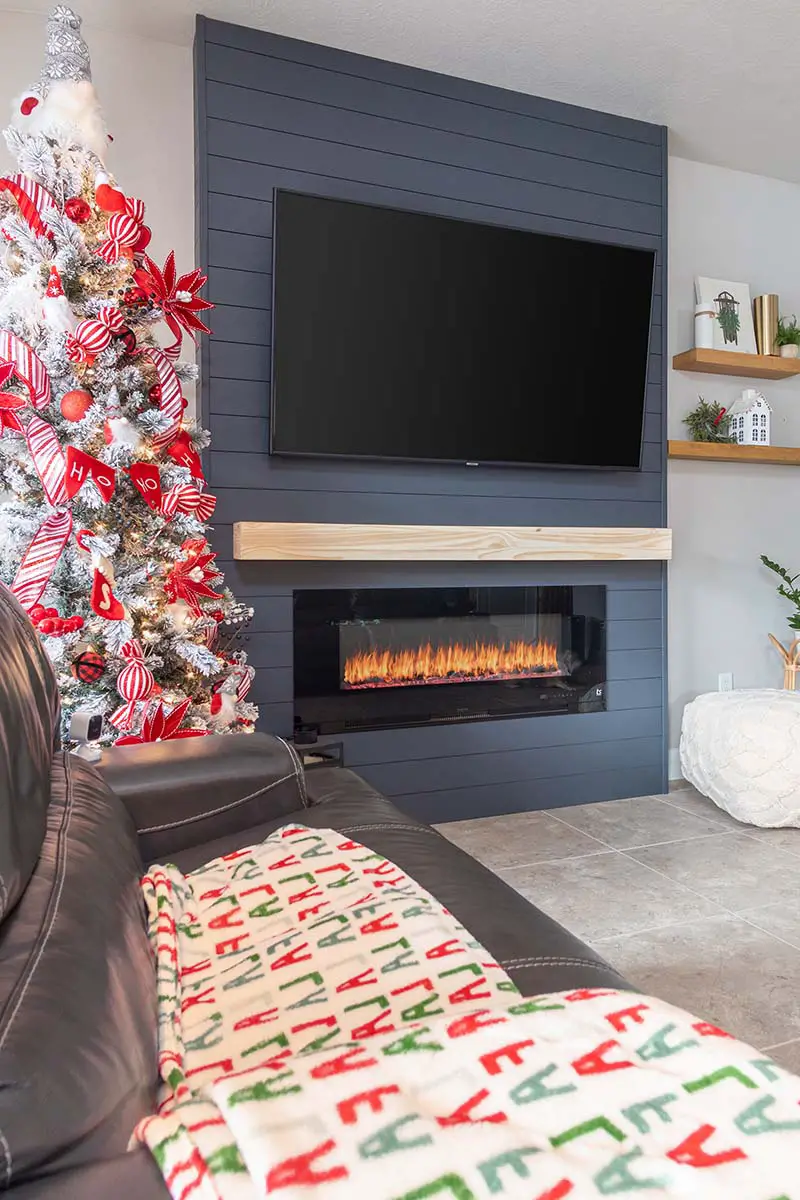
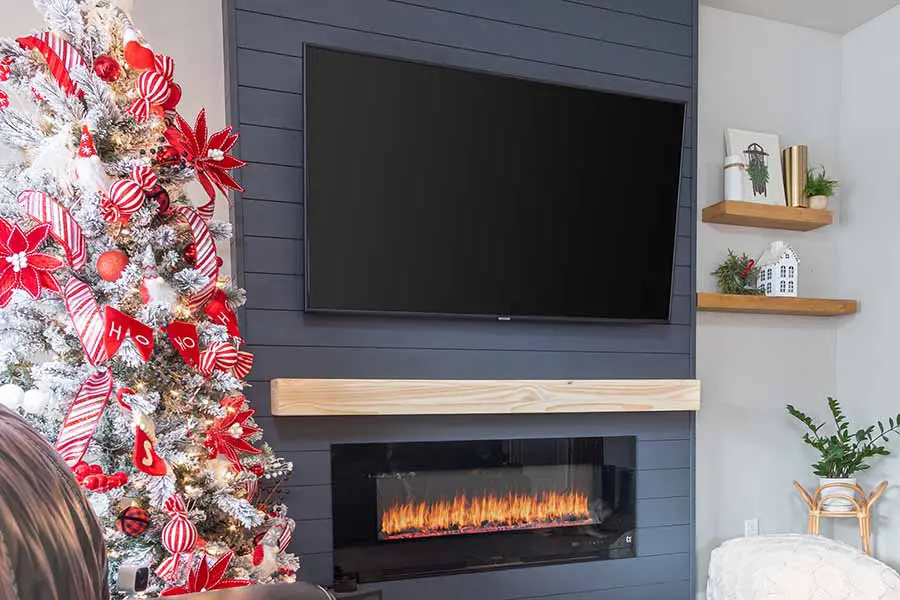
Here is what it looks like all completed. If you like this look, Check out how we made our shiplap wall.