The method we used to build our shiplap wall is a bit different then the other methods we saw out there.
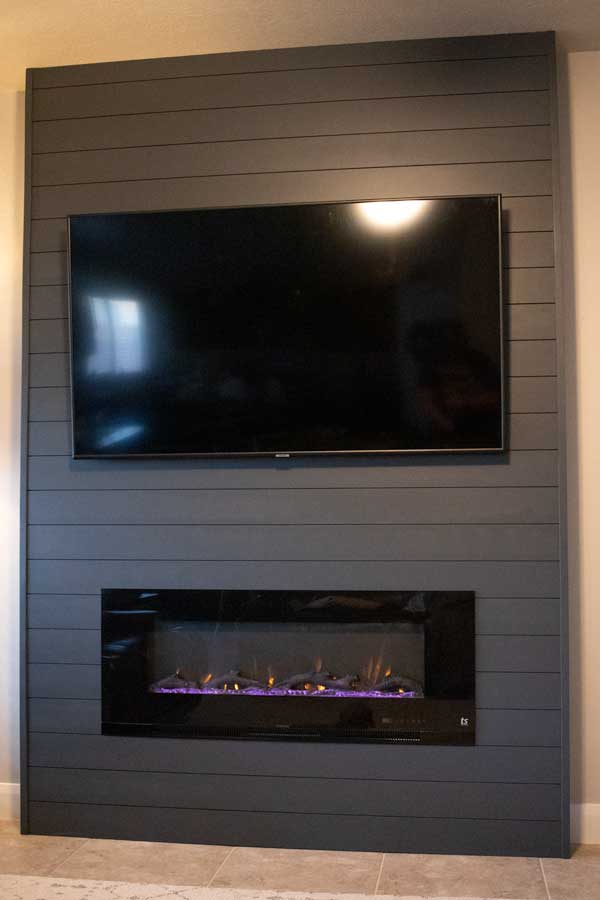
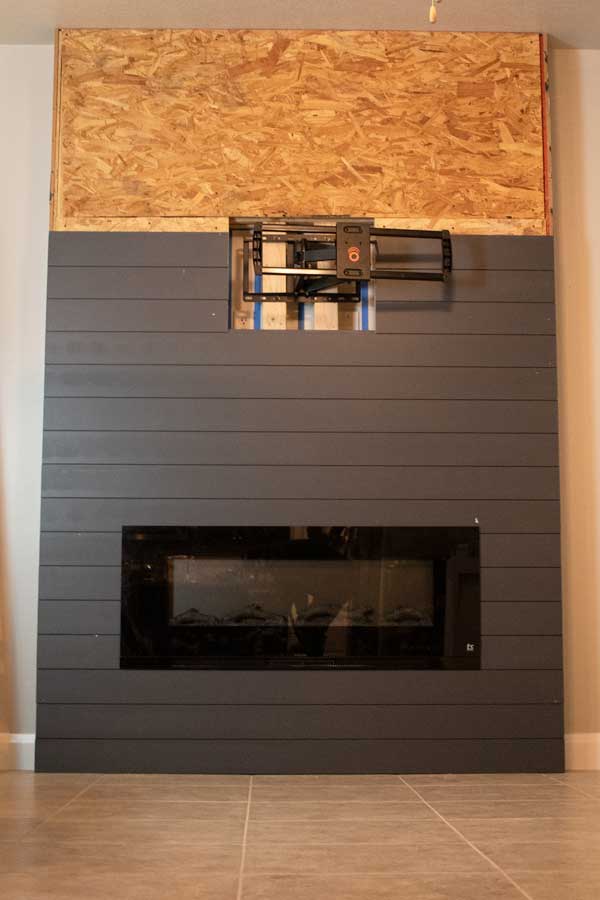
We only wanted a small bump out of 6 inches, just enough to recess our fireplace and give dimension to our shiplap accent wall.
I personally think this is the way to go, especially in a smaller home like ours.
Because our ceiling is at an angle. We hadn’t settled in on a tv height, but we knew we wanted the mount recessed, and we wanted a little play with the fireplace height.
We opted to build directly off of the wall in layers, instead of building a frame, and then placing it.
We also have added a fireplace mantle, Here is more on how we made that.
Tools And Supplies
- Shiplap (we used MDF board)
- 2×4 Wood
- Plywood
- Drill
- 3.5 inch wood screws
- 3 inch wood screws
- 2 inch wood screws
- Brad Nailer (amazon)
- 18 ga Brad nails
- Saw (we used a miter saw and skillsaw)
- Adjustable TV mount
- Electric Fire place (amazon)
Building Your Own Shiplap Wall
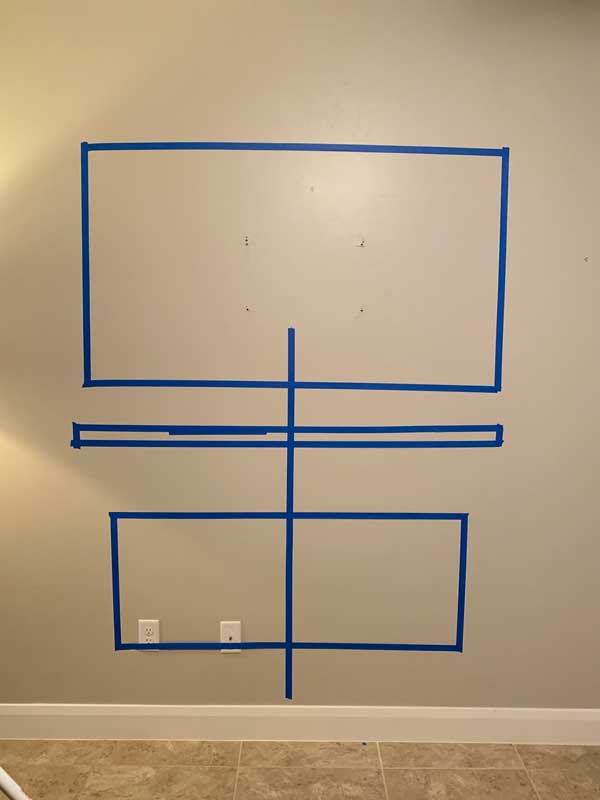
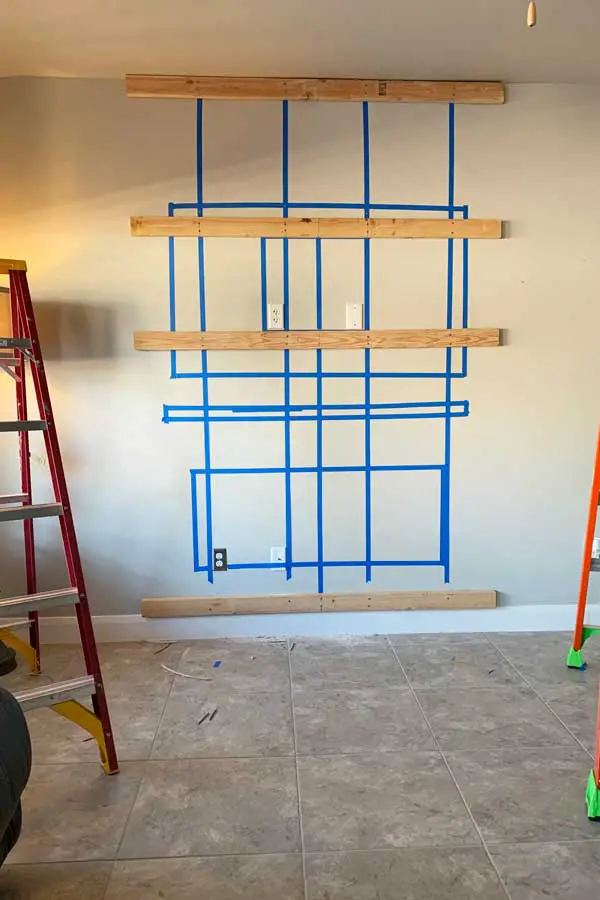
Step 1- Find Center And Studs
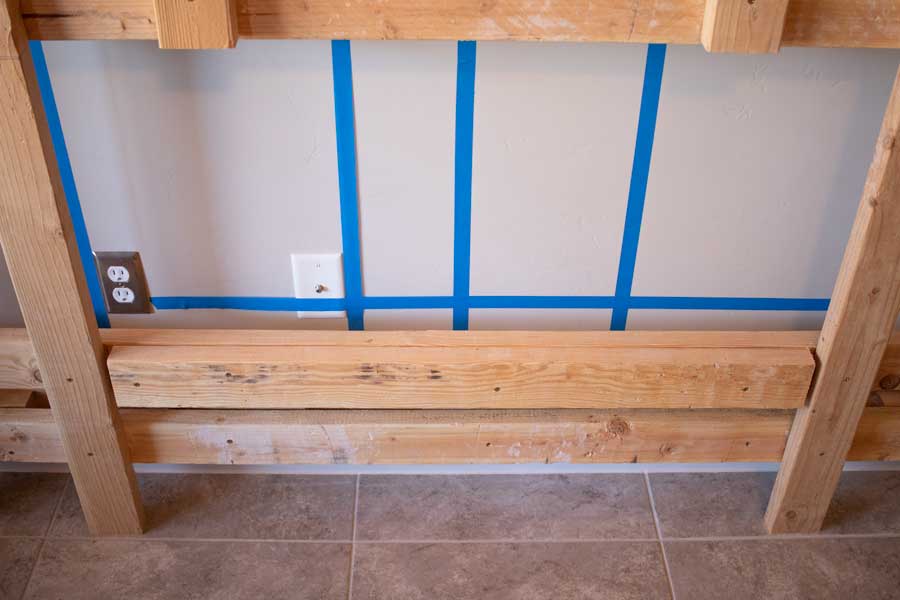
Find the center of you wall and mark it.
I used painters tape, to lay down guide lines.
The line in the middle is center and the boxes are giving me a rough idea of where everything will be when I am finished.
From there we marked out where all the studs were using a stud finder.
We ran painters tape down, from the top to the bottom, to make finding the studs easy
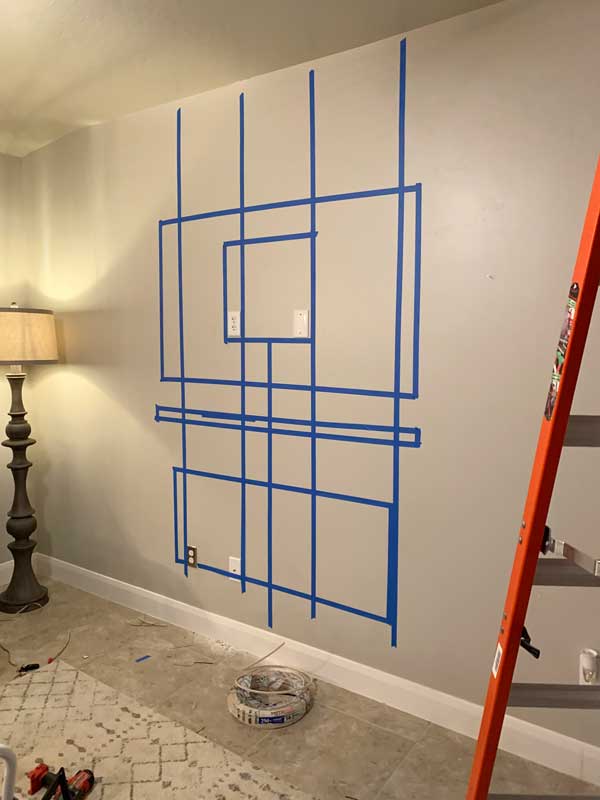
In the picture above you also may have noticed the wire roll on the ground. While we could have still used the outlet below, it would be impractical because we would have to take the fire place out to unplug the tv.
That’s why we added a cut in box and outlet. If you choose to do this step, You may need to get help. We also added another cut in on the other side to run a HDMI to another room where we will keep our media players.
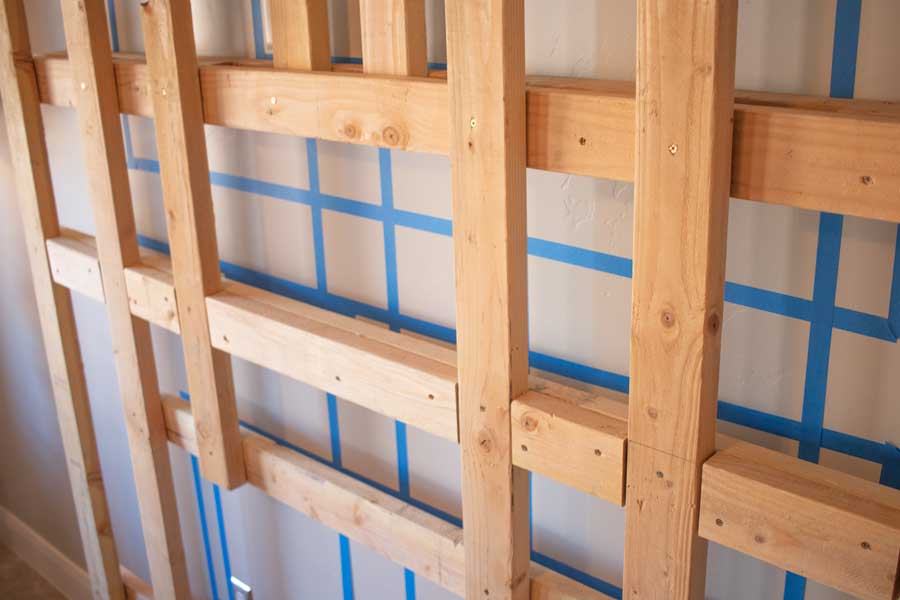
Step 2- Layering Wall Frame
Layer 1
Cut 4 of your 2×4 pieces to the length you want your wall.
Keep in mind that if you cover you frame in ply wood, like a did, it will make your wall slightly wider.
Using 3.5 inch wood screws and a level, drill your 4 pieces to the wall.
We would mark center on the wall and center on each 2×4, to make make sure all four pieces where directly aligned when we were done.
The reason why the 2×4’s are not evenly spaced is because we are building a box around where the tv mount will go.
Layer 2
Cut 18 8″ pieces of 2×4 and screw them to your first layer using 3″ wood screws.
Space them in between the studs.
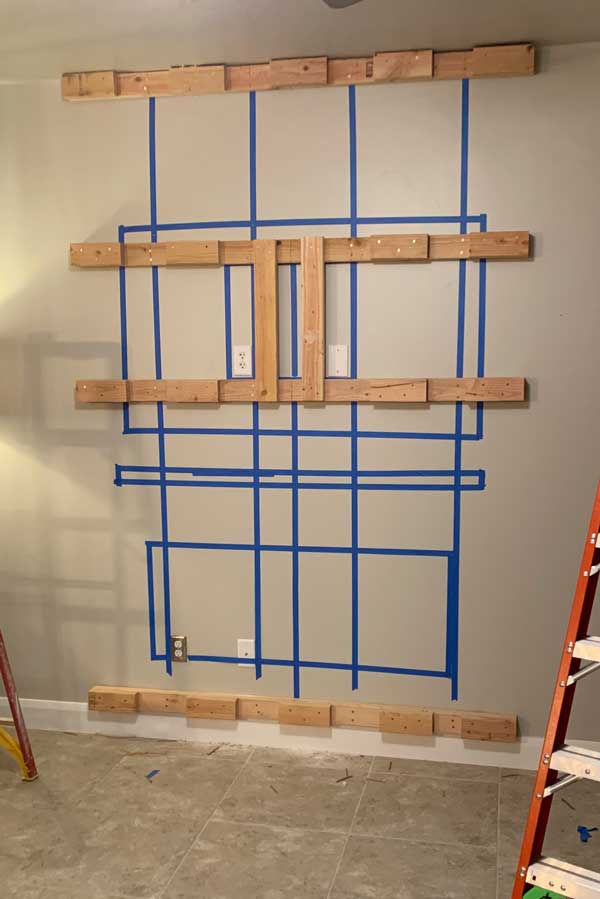
if you are building a box for your recessed tv mount. Cut two pieces that span your middle boards on the first layer.
Layer 3
Cut 4 pieces to the same length you did for your first layer. Use 3 inch screws to fasten those pieces to layer 2. Make sure this layer lines up with layer 1.
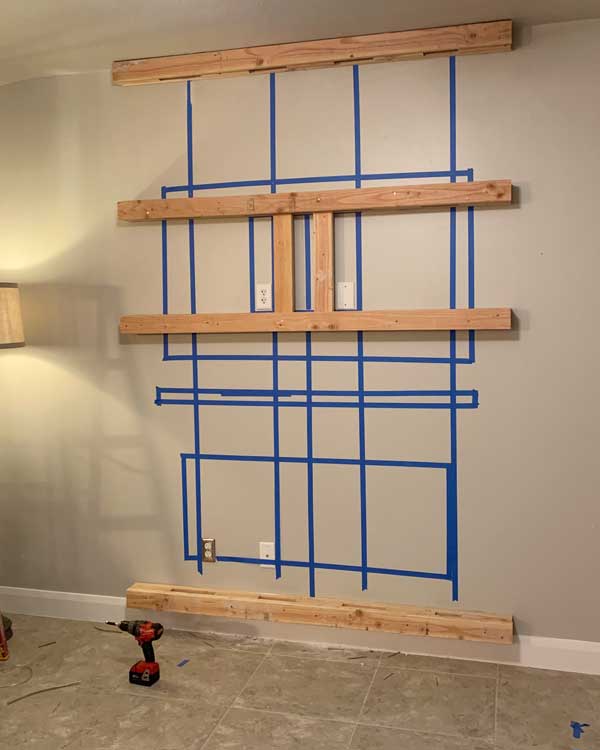
Layer 4
Now we add our vertical 2x4s
You want to have them come down full on sides.
You want 2 more that come down where the sides of your fireplace will be. It is important to get them in the right spot for you fire place to be centered.
The touchstone fireplace we used is secured with screws on the sides.
And the 2 last ones should come down to about the top of your fireplace. They will be on either side of the box built to recess your tv mount.
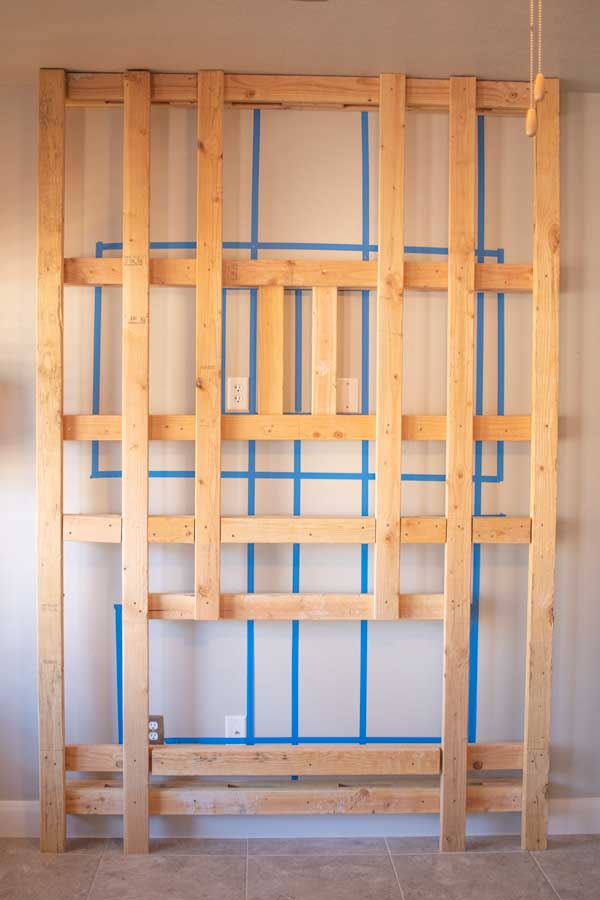
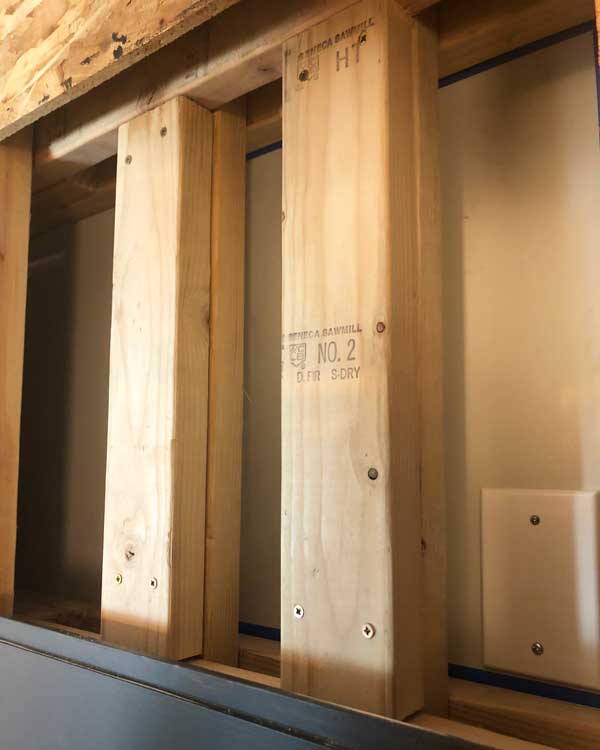
Layer 5
This is the point where you can fine tune your fireplace placement, and add support if you plan on adding a mantel .
To give a ledge for the fireplace to sit on, add a 2×4 across at the height you want your fireplace. I did mine at about 18″.
We put our fireplace at exact spot that we could use three complete shiplap boards. You will have to measure three pieces of you ship lap pressed together if you want to do the same.
Slide a piece behind and screw it at your desired height, and the add an extra support in front. like the image below.
Do the same for where you want your mantel.
Slide a piece behind, screw it to the vertical board, and then add extra supports in the spaces.
Keep a note where you have the mantel supports, so it will be easy to add it later.
I also added extra support for the tv mount later on, but you should go ahead and do that now.
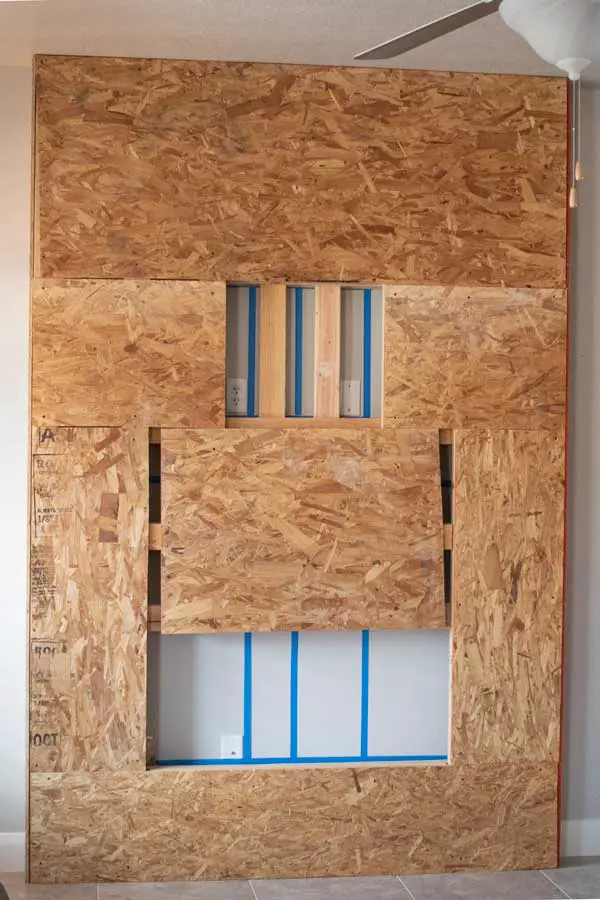
Step 3- Adding Shear
Cover your frame with plywood, in as few pieces as possible. Use 2″ wood screws.
We only had two sheets so we didn’t get it to look as clean as we could, but it is all going to be covered with shiplap anyway.
Step 4- Shiplap
Starting from the bottom work you way up.
You can cut your shiplap at 45 degree angles and if it join with the sides, but it is difficult and time consuming.
I preferred to cover my ends with some trim, and I am very happy how it turned out.
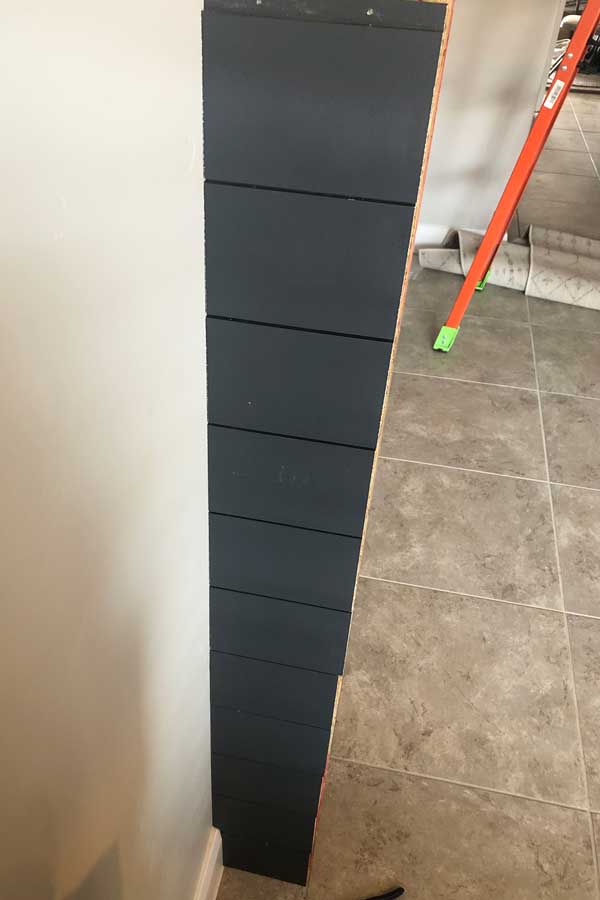
Start with your sides and cut you pieces to they are almost flush with the plywood on the front, you want the a hair less. It is better to be a hair under then over if you are going to use the trim to finish the wall off.
Note: I would try to do my sides a little more flush if I was to do this again.
You will need to cut a notch out to fit around you base boards. I used a hand saw, but if you have a jigsaw it would be better.
I used a a bradnailer with 18ga finishing nails. I put the nails in cracks so you can not see them. However, if a piece that wasn’t sitting perfectly flat I would throw in a extra nail wherever I needed to on the shiplap, so it was tight.
After you do both sides you can start on the front.
For the front you want to cut you pieces so that is covers the ends of the shiplap on the sides.
You want it to be flush as possible or a hair less, not over.
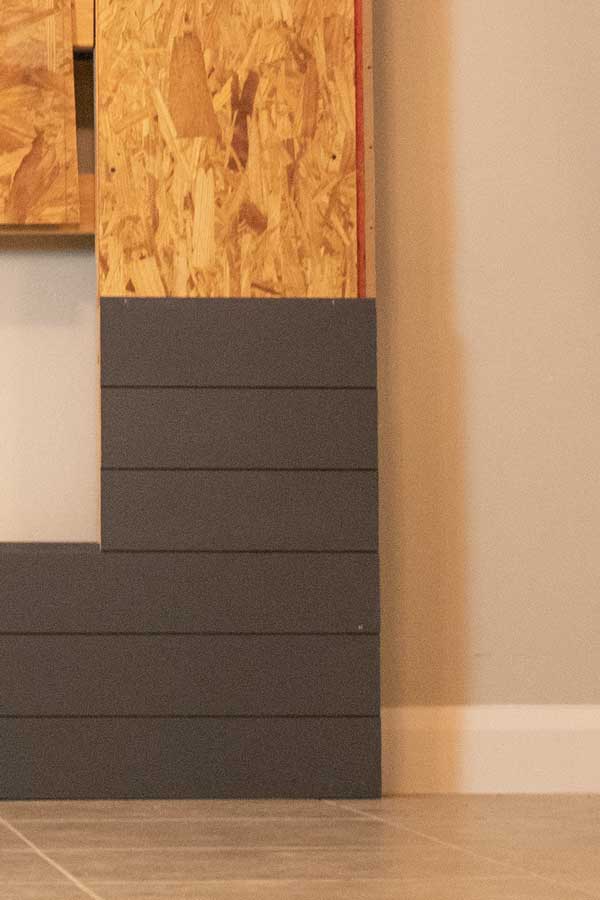
Work you way up the front.
Note: Most fireplaces have a cover that is going to hide defects near the hole. and your television will hide some as well.
I mounted my fire place as I went up, But I will cover that in the next step.
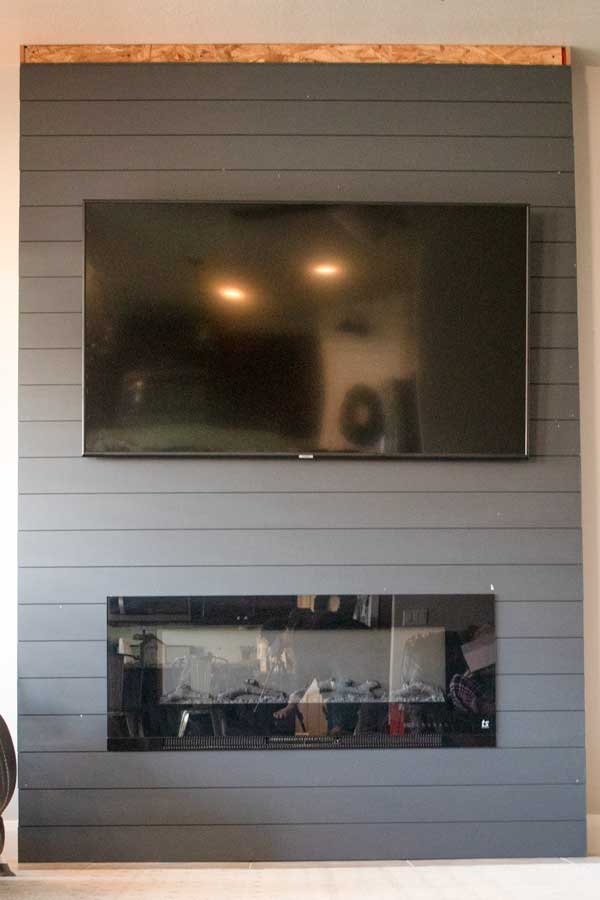
To cut the piece at the top we used a circular saw and the straight edge of another piece of wood. Because our ceiling is slanted it was a slightly angled cut.
It was a near perfect fit, but one side was slightly to tall, so we used a orbital sander to bring it down, little by little, until it fit snug.
Step 5- Mounting
Follow the directions for your fireplace and tv mount.
We chose to use a outlet in the back, but you can hardwire it in if you prefer.
To hang our fireplace, we drilled in pilot holes, after making sure the fireplace was level. This makes it is easy for screws to go in, and not go in at odd angles.
Then screwed in the fireplace.
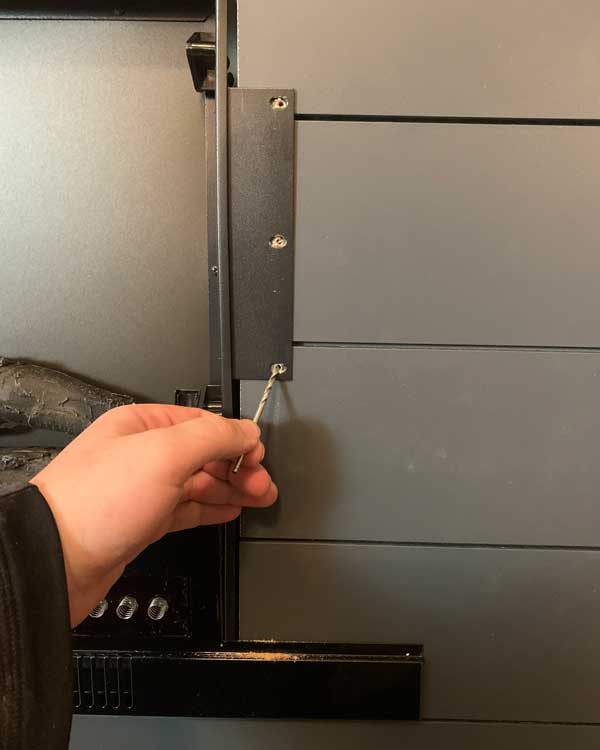
We use a tv mount that is adjustable and moves around, which is what I recommend for this style of wall build.
Step 6- Trim And Touch Up
To cap off the ends we added some corner trim we bought at Lowes. We put brad nail at the top, bottom, and in two spots in the middle.
After, all that was left was touch up paint. We covered any nicks and any brad nail divots.