I can’t tell you how OBSESSED I am with Holiday Gnomes! My family had a gnome craft day, and it was such a hit. I have made an easy Tutorial for you to make one for yourself. These steps don’t include a sewing machine for your gnome hats, but you could easily sew them if you wanted to.
Items Needed
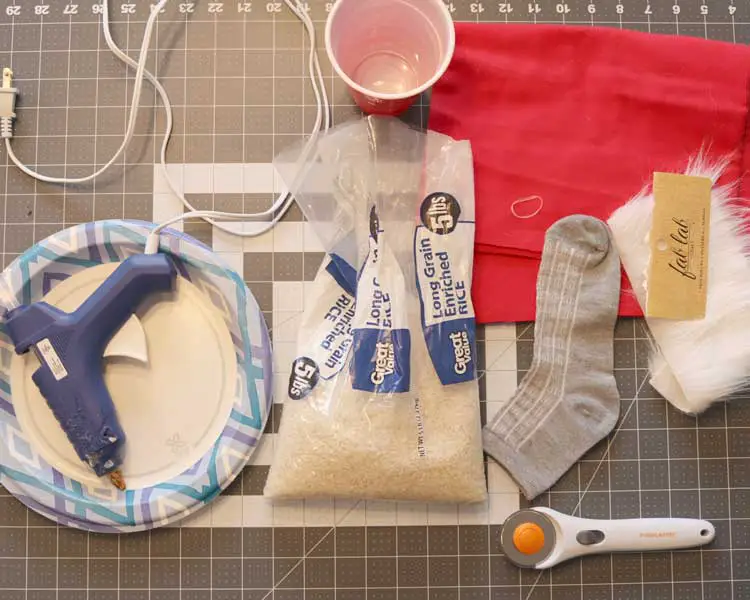
- Fabric
- Rice (the amount will depend on how big of a body you want for your gnome and how big of a sock you use)
- Sock (Use a sock that is longer, you can cut the top off and be sure it doesn’t have tiny holes where the rice would be able to come out of)
- Elastic for the nose (amazon)
- Faux Fur for the beard (amazon)
- Scissors (I used a fabric roller cutter to cut my fabric, scissors will work too)
- Disappearing Fabric Marker (get at amazon or you can use something else to mark your fabric with)
- Hot Glue Gun
- Cup for your rice
Let’s Make Our Gnome!
Step 1
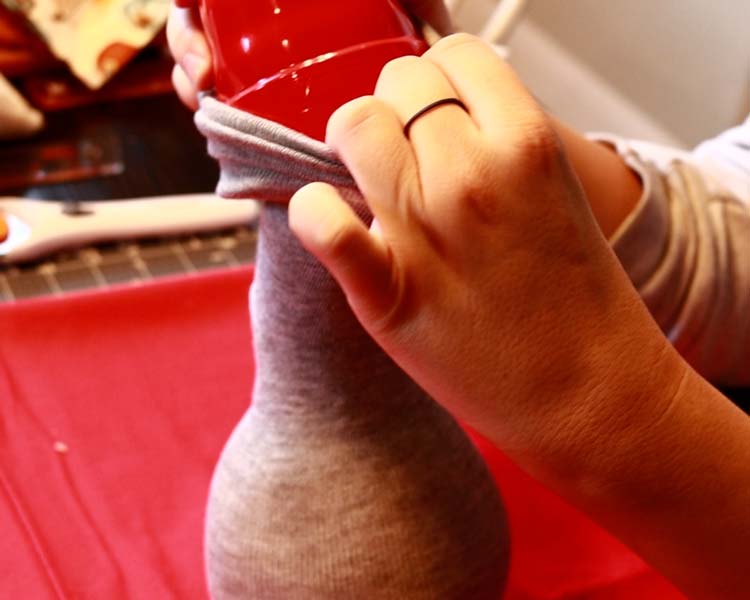
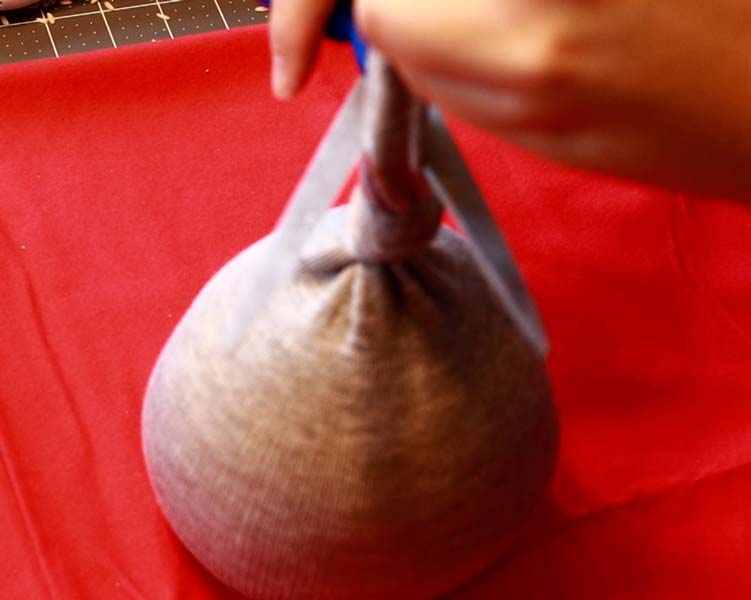
Grab a cup full of rice and pour into your sock. I usually do 2 – 2 1/2 cups of rice. The amount of rice will depend on how big of a gnome you want.
Step 2
Once you have your sock filled, tie the top and snip off the excess sock.
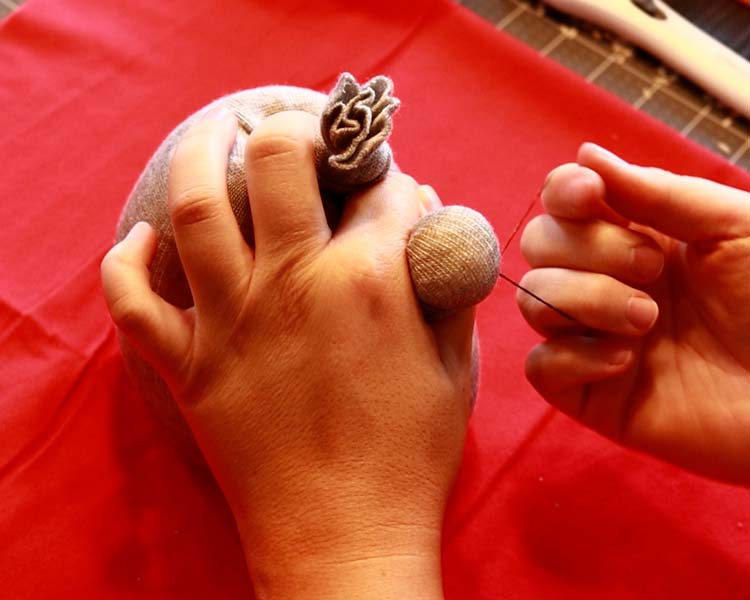
Step 3
Find the placement where you want your nose. Take your fingers and pinch a small ball of rice and pull towards you. Take your elastic and wrap it around the nose so it’s secure.
Step 4
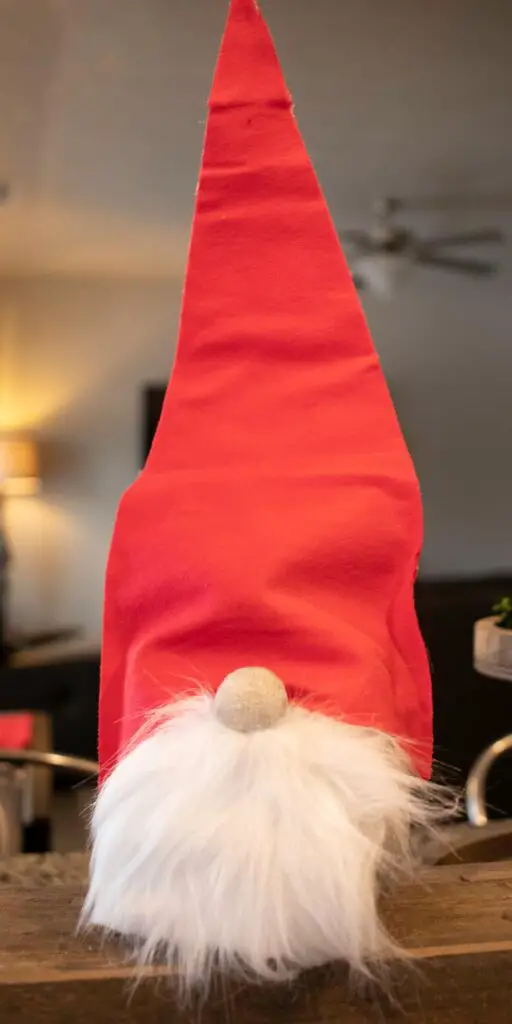
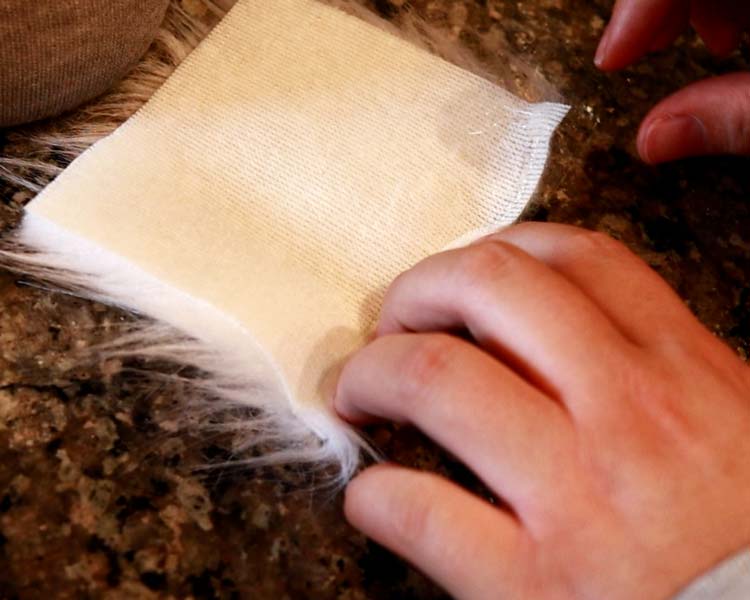
Time for your beard! I take a piece of the faux fur that I use from Fab Lab, and cut a piece off measuring to be 3 1/2 inches wide x 4 inches high.
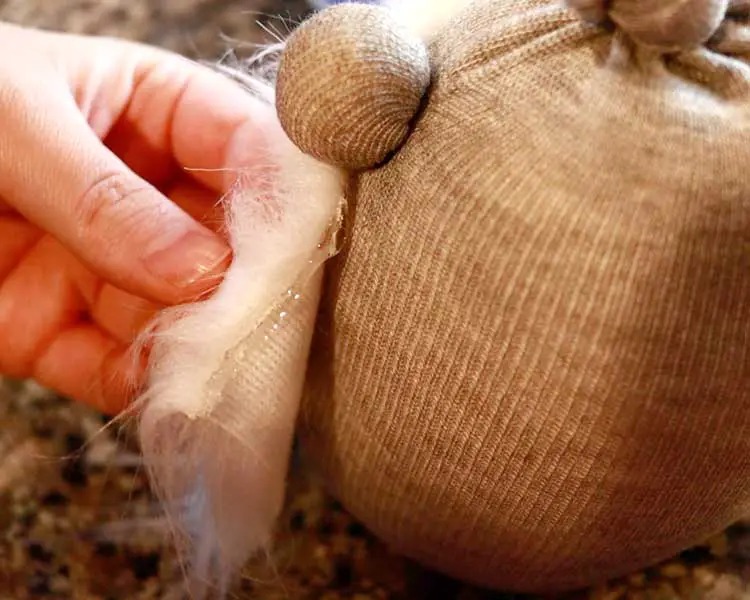
Put hot glue on the back side at the top of the beard right along the top edge. I like to fold the top of the beard over once. I feel like it makes it easier to get close up around your nose.
Step 5
Now take your beard and place it up around the nose. Hold one side secure while you hot glue one side and repeat for the other side. I try to get it pretty high up since the hat will cover any extra beard. Fluff out your beard how you want it to look.
Step 6
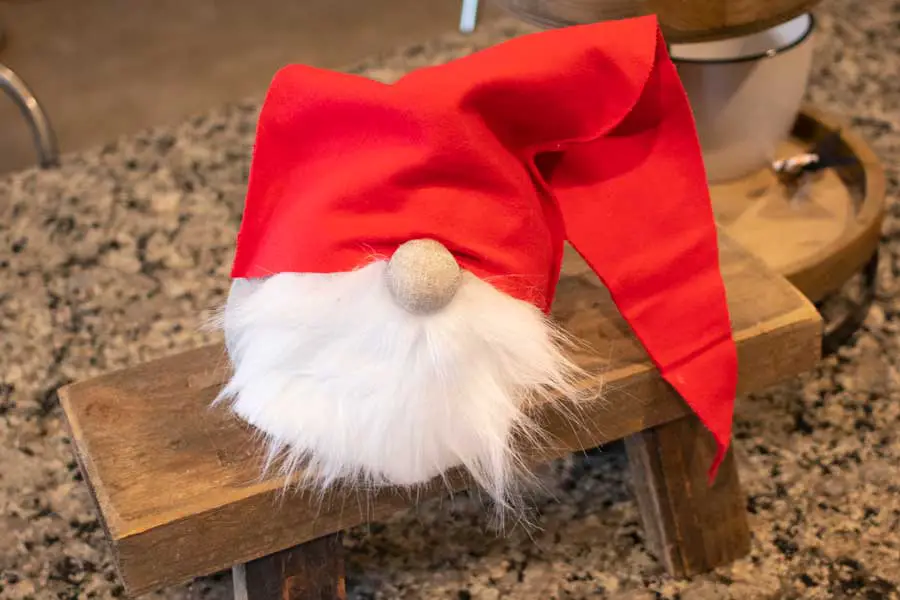
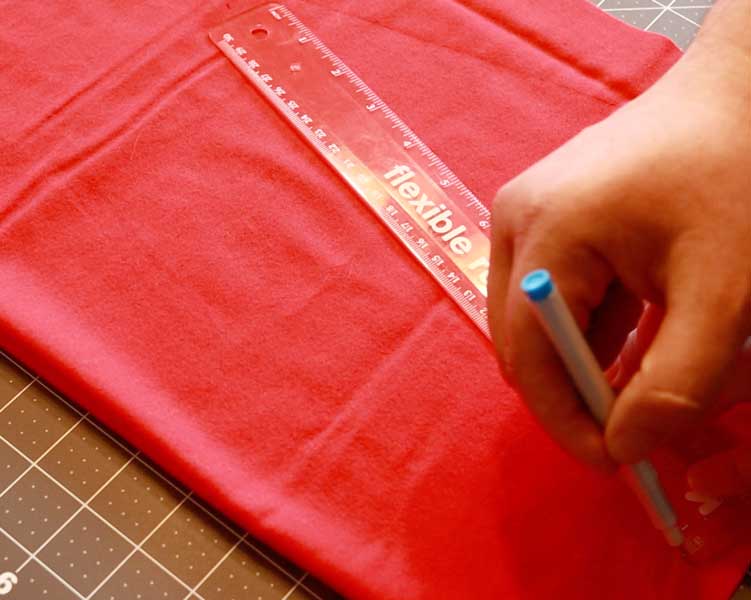
Take your fabric and lay it flat onto your cutting surface. Place a mark at the start of your ruler, a mark in the middle at 4 inches, and a mark at 8 inches.
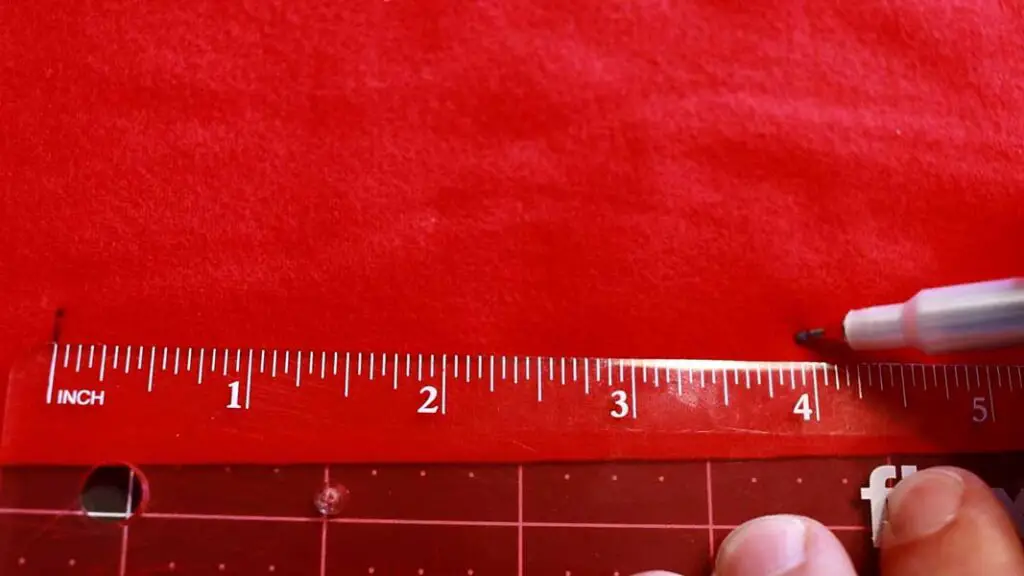
Take your ruler and place a mark at 15 inches long. Draw a line from your first mark and your 8 inch mark to the 15 inch mark making it into a triangle shape.
Step 7
Hot glue the triangle sides together so that it makes your gnome hat. Place the hat onto your gnome how you want it and hot glue to your gnome body so that it is secure. (You don’t have to glue the hat down if you plan on making hats that you change out on your gnome). I like to place the hat over the beard and fluff it out.

Step 8
Now it’s time to find a home for you gnome! I usually have a few gnomes placed around the house. I think they are the cutest little accent decoration especially for the holiday’s although I usually have gnomes out year round.