
Christmas time is my favorite! I love all the decorations and colors, but most of all I love all the Christmas trees! There’s so many varieties of trees…. colored, flocked, non flocked, warm lights, colored lights. The past couple years I’ve really been trying to learn different/better ways to decorate my trees. This year I was happy that I bought a flocked tree. I think this is my favorite tree that I have decorated so far! Remember, there’s no right or wrong way of decorating!
Steps on how to decorate a Christmas tree.
- Planning Your Theme
- Fluff Your Tree
- Add Tree Lights
- Add Ribbon
- Place Big Ornaments
- Add Florals
- Add Christmas Sprays
- Add Large Detail Items
- Add Medium Size ornaments
- Add Small Detail Items
- Add Tree Skirt/Collar
- Place Topper
Christmas Tree Supplies For Decorating
- Christmas Tree (I used a 6.5 flocked tree from Walmart)
- Florals
- Christmas Picks
- Christmas Sprays
- Large Ornaments
- Medium Ornaments
- Wired Ribbon
- Santa Signs/Jolly Sign
- Light Up Mini House Picks
- Tree Skirt
- Tree Topper
1. How To Plan Your Christmas Theme
- Choose Color Scheme
- Find Must Have Decorations
- Base Other Decorations On Main Pieces
The first step in planning your Christmas theme is choosing your colors. Once you have your color scheme chosen we need to find ornaments, ribbon, and decorations to make your vision come alive. In order to get the supplies you need, you are probably going to venture out to several stores and/or shop online.
Hobby Lobby can sometimes be a great one stop shop for all things Christmas. Unfortunately for me and many others a Hobby Lobby is just too far away, and their online selection doesn’t have the variety of what is in store. So I shop at Michaels, Walmart, Joans, and a couple small local shops in my area.
While shopping I will find a decoration that I absolutely love such as a ribbon, sign, ornament, topper and base my other purchases around that to tie into my theme.
Here are some examples of trees that I have decorated, and what themes they’re based off of.
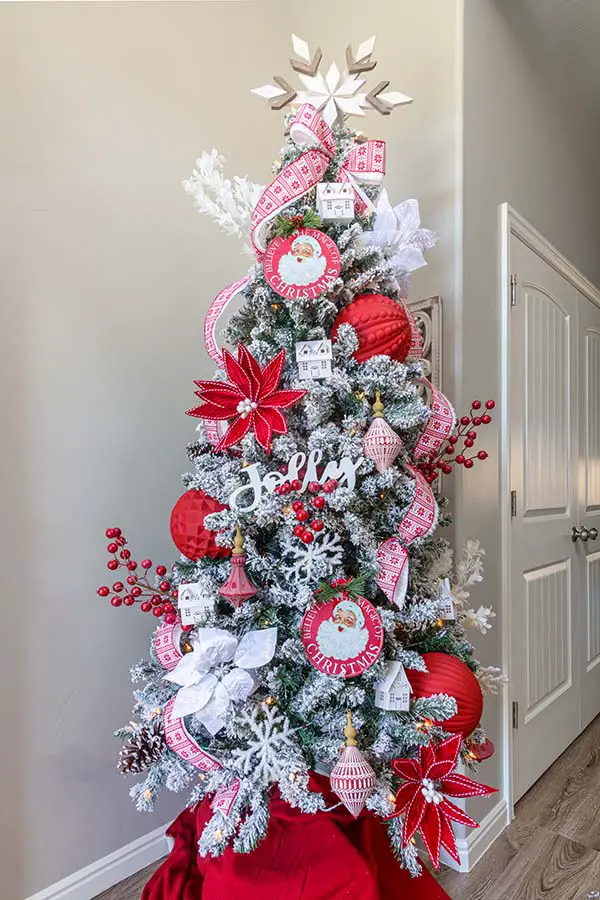
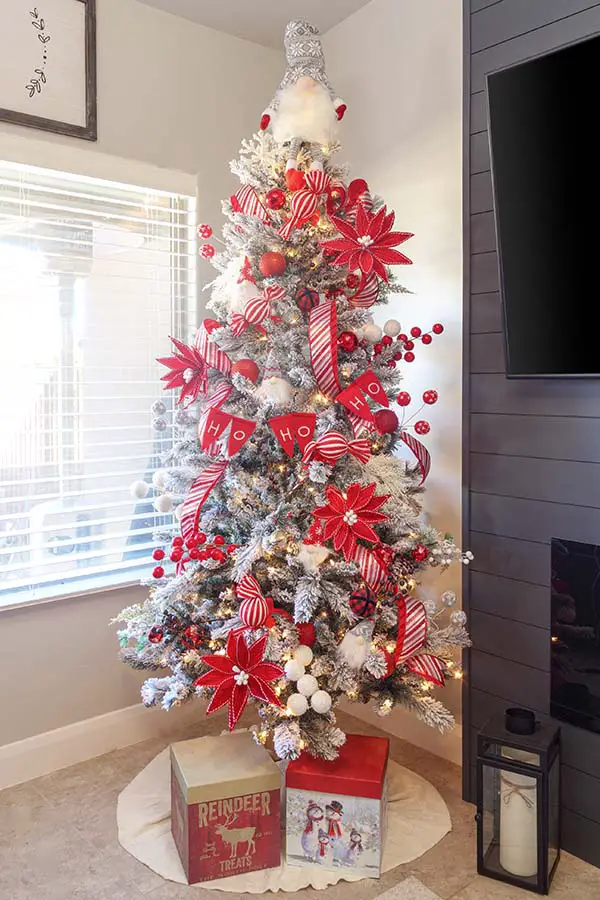
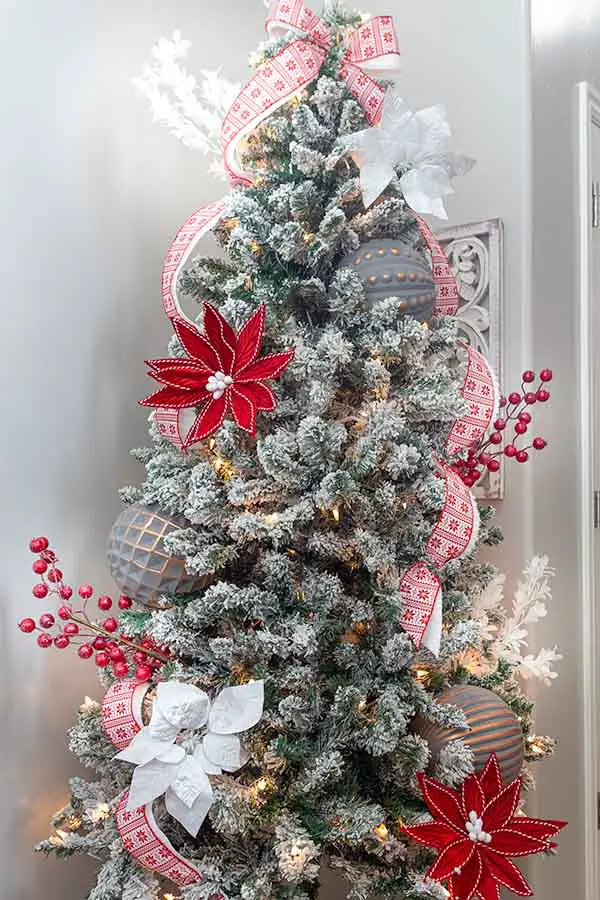
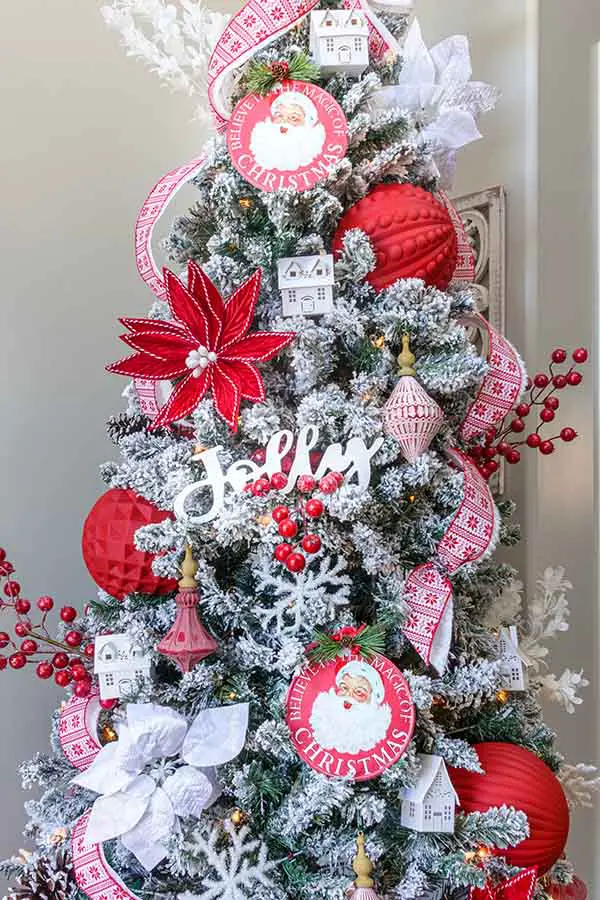
Tree #1 Santa’s Coming To Town
My color pallet was red and white for this tree. I based my decorations around my Santa signs. The signs have that vintage Christmas style so I wanted to add some more vintage ornaments throughout the tree. I also mixed in several traditional flowers with some pops of red berries.
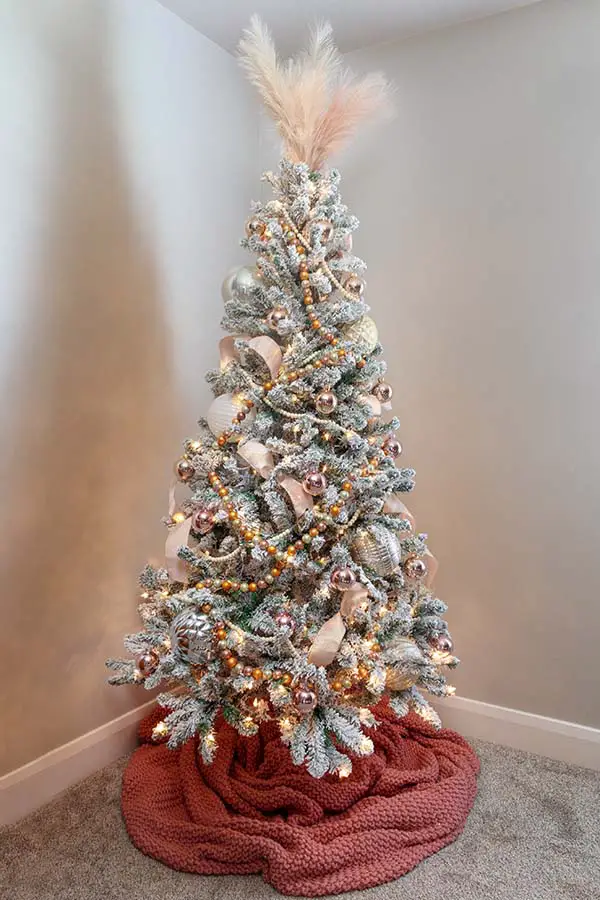
Tree #2 A Boho Christmas
I based this tree off the colorful garland that I picked up at Michaels. The tree features silver, gold, and light pink decorations with a soft pink ribbon. The topper is a pampas grass spray.
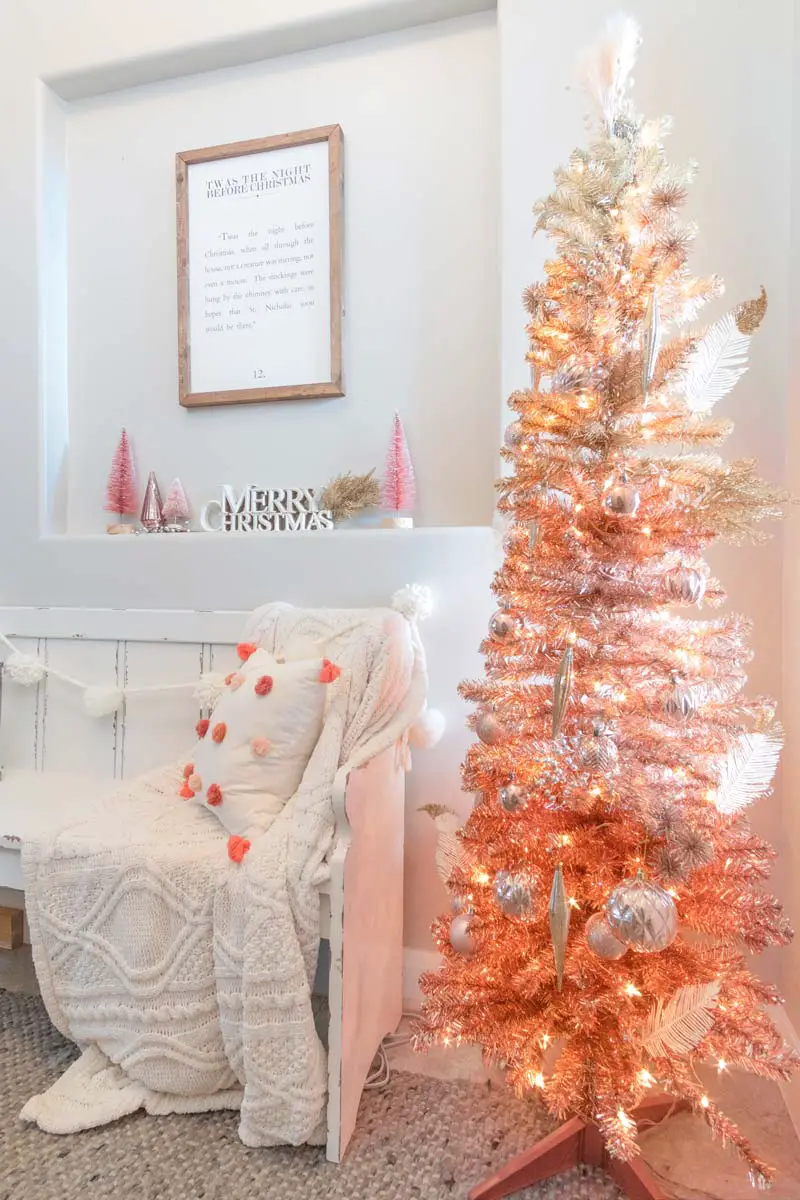
Tree #3 Elegant Rose Gold
I based this tree off the tree itself. The tree is a very unique rose gold with branches made of tinsel. Since the tree is already colorful, I used neutral ornaments. I added some feathers with gold tips to just give it a little extra pop.
2. Fluff Your Tree
This is an important step in the process because you want your tree to seem full and not have huge gaps. This is why I like having a flocked tree, it definitely gives your tree a fuller look.
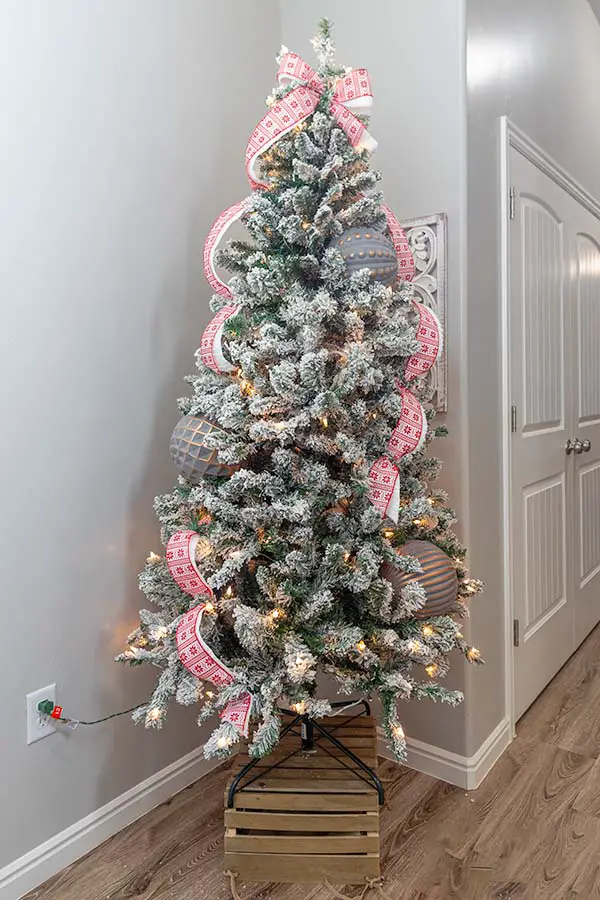
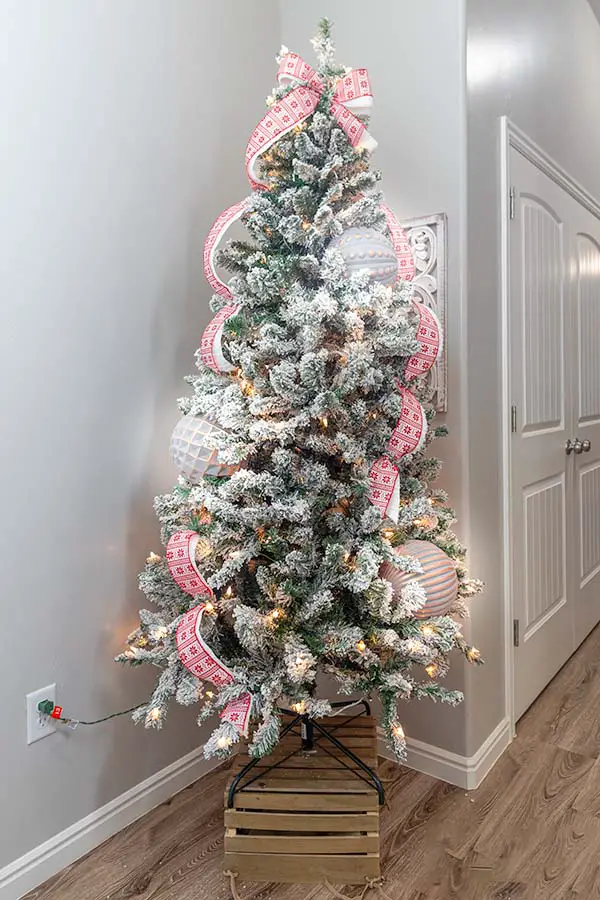
Here is an example of a non flocked and flocked tree with similar decorations.
3. Adding Tree Lights
Before you get to decorating your tree, you will want to add your lights. I would recommend buying a pre lit tree to save yourself some time.
4. Adding Your Ribbon
Start off with adding your wired ribbon. In my example below, I used 2 different types of ribbon. They are both wired and the same width. I have a patterned ribbon for the top and a white felt-like ribbon underneath that I layered together. Start at the top of your tree- I secure my ribbon by wrapping one of the pieces of the tree branches around the ribbon. Pull your ribbon outwards making a half loop- secure with wrapping the tree branch around the loop then start making more loops down the tree and cut at an angle once you hit the bottom where you want each section to end. I worked in 3 different sections for my ribbon in this specific tree, but you can add more or fill in the gaps at the end.
5. Placing Big Ornaments
I love big ornaments and I will usually start with these since they take up more space and it’s easier to work around them. To keep your ornaments firmly in place, you will need to bend some of your branches. In the example below, I added these 3 different patterned/textured ornaments. One problem with them was they were the wrong color for this tree so I decided to paint them to match the rest of my trees color pallet.
6. Adding Florals
Since my tree is a 6.5′ tree I used 4 florals to work down my tree in a pattern. In my example below, I placed them in a pattern of white, red, white, red going all the way down. The bigger your tree is, the more of these you will need.

7. Add Christmas Sprays
In this tree I used red berry sprays and white frosted sprays. Figure out what placement you want for these on your tree and then stick them into the tree coming out the sides, and mixed into the middle. In my example below, you can see a few are sticking out the sides and where I placed some berries into the middle. These are nice because the sticks that come on them can bend pretty good so you can place them wherever you want.
8. Adding Large Detailed Items
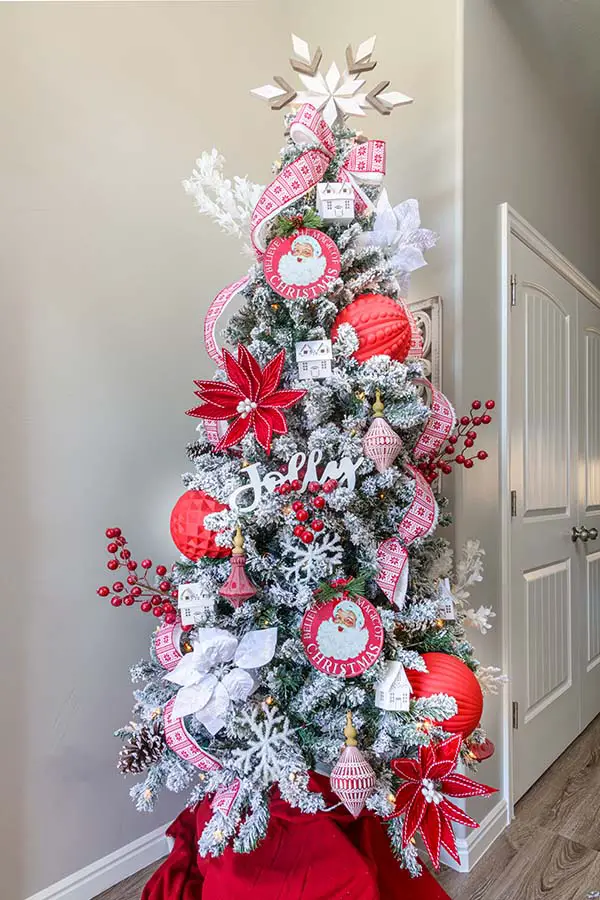
I mentioned earlier in this post that I like basing my tree theme off specific items I find. For this tree it was the vintage Santa signs, and Jolly sign. These had little holes at the top where I was able to take a ornament hook and thread it through while wrapping it secure with the tree branches. In my example below, I spaced the 2 Santa signs between the Jolly sign in the middle.
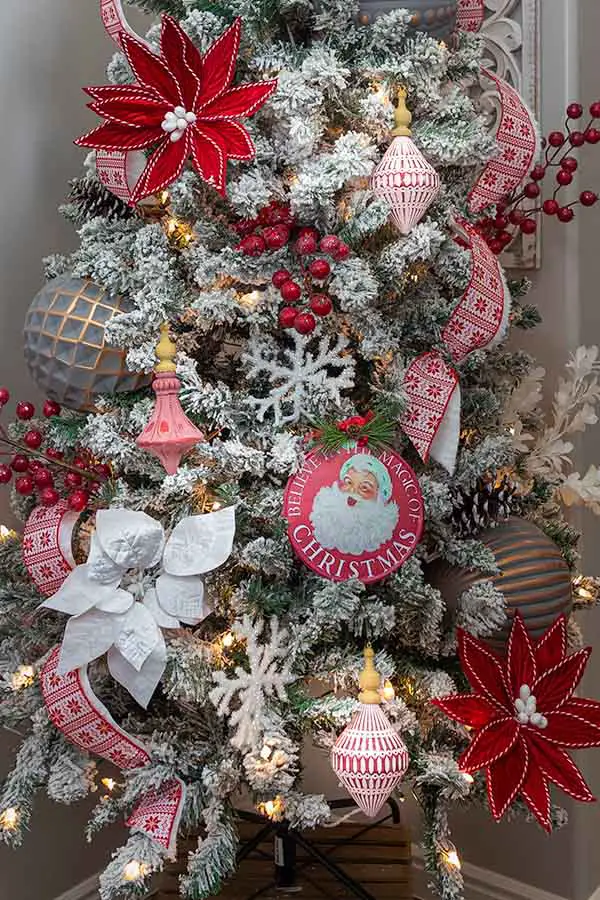
9. Add Medium Size Ornaments
Once you have your large detailed items placed, it’s time to add the medium sized ornaments. I added the vintage ornaments that I found that went really well with the vintage Santa signs. In my example below, you can see that these ornaments have a unique vintage shape, pattern and texture on them.
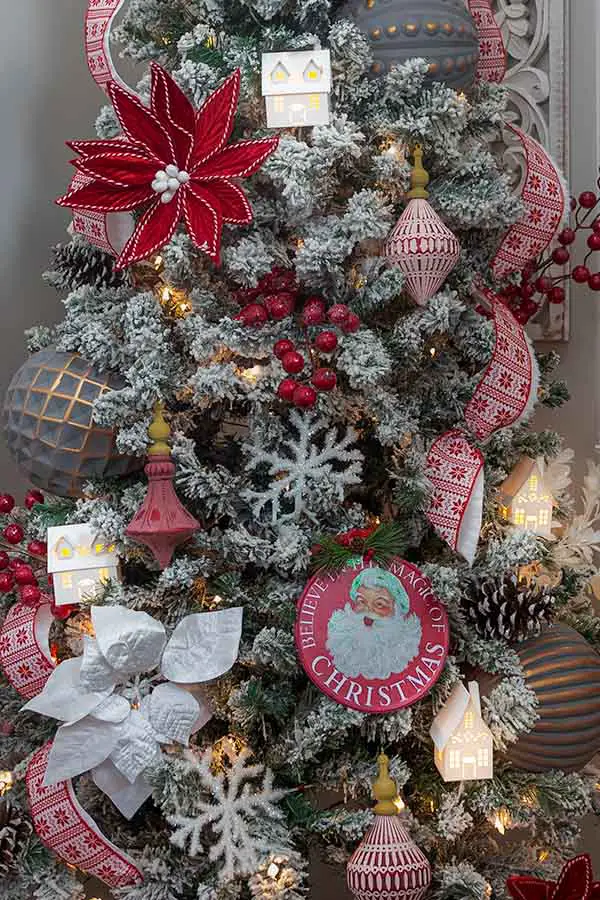
10. Add Your Small Detailed Items
Put your final touches on with your small detailed items. You could add your family or small ornaments to complete your look. In my example below, I added these mini houses that light up with a few small snowflakes and pine cones.
11. Add A Tree Skirt/Collar
Place your tree skirt around the base of your tree. Or you can do what I did, and use a blanket!
12. Finish With Your Topper
You could make a topper with picks and sprays or you can go a more traditional route adding an angel or star. In my example below, I topped my tree off with this wooden snowflake that my father in law made. I thought it looked really cute and since there’s a few snowflakes through the tree it ties it all together.