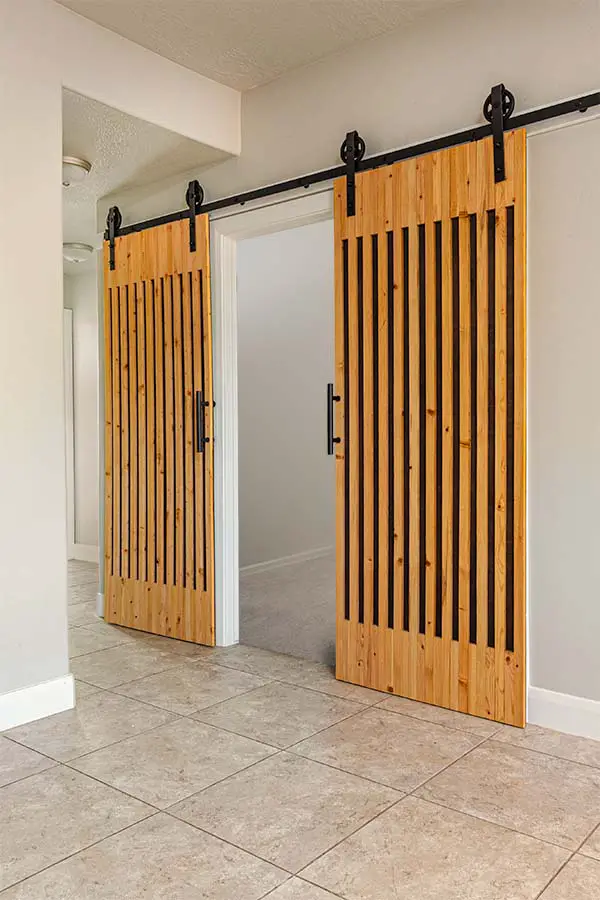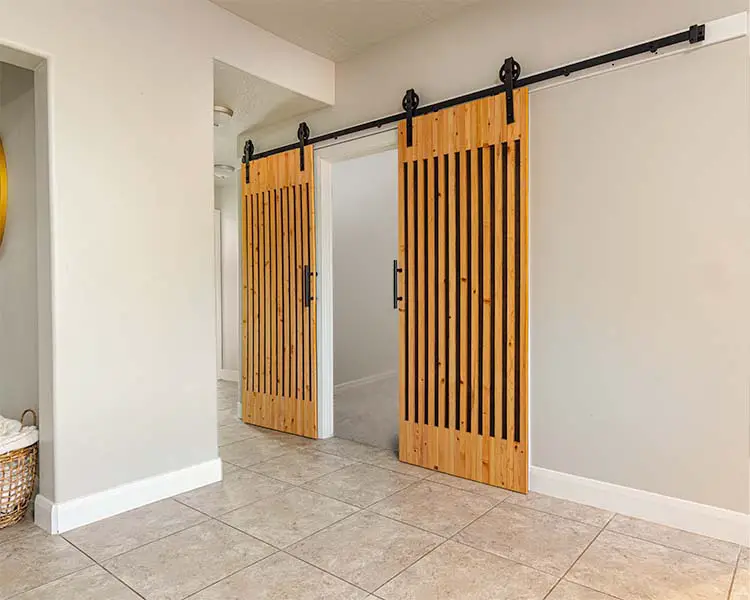
This is how we made our slated barn doors. Here we explain how we made them and what we would do differently if we had to make them again.
Tools and Supplies For Slated Barn Doors
Tools
- Circular Saw (it is possible to build with only this saw)
- Table Saw
- Miter Saw
- Planer (nice to have not required)
- Clamps
- Brad Nailer
- 4ft Ruler
- Orbital Sander
- Barn Door Installation Kit
- Barn Door Handles
Supplies
- 2×6 wood – Get 8ft pieces, unless you have really tall door ways then you will need even longer. You could also potentially use furring strips instead of cutting your own strips. The problem I ran into was there was very few straight pieces at the home depot I went too.
- Ply Wood – You want ply wood that has a good face, because you will be able to see it. I ended up getting 1/4″ plywood but really wish I got thicker material at least 1/2″, if not 3/4″.
- Wood Glue
- Brad Nails – Because I used 1/4″ ply wood I ended up having a couple nails blow out with 3/4″ nails. So I dropped down to the 5/8″ nails.
- Stain – I used “Natural” stain for my slats, and “Early American” for my plywood back.
- Sand Paper
How To Build A Wood Slat Barn Door
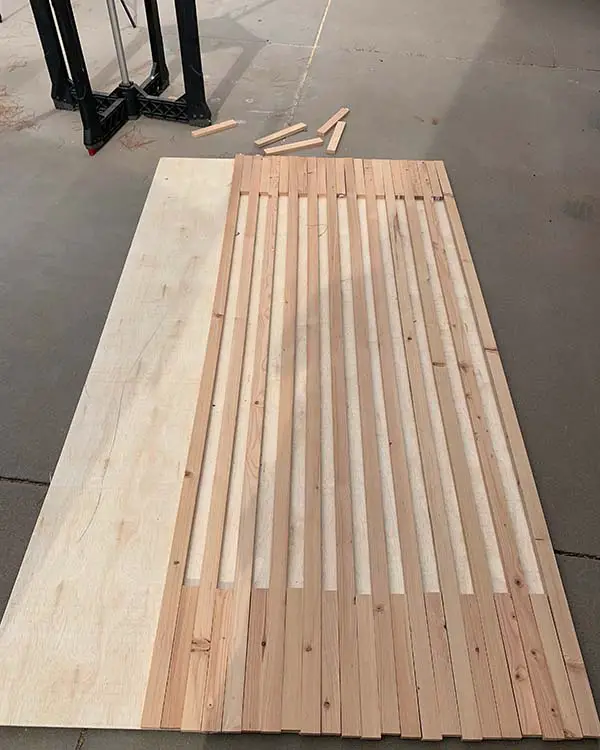
- Cut slats to a little longer than you want your door
- Lay out slats on plywood to find the width you want your door
- Cut your ply wood to size
- Sand and apply stain to slats and plywood
- Glue your slats to the plywood
- Flip over and add brad nails from the back
- Cut your door to final height
How To Cut Wood Slats
First note, you want to pick out the straightest stock you can from how the store, especially if you are working with limited tools. If you are able to buy furring strips that are straight for a good price, that is the route I would take. If not, then we are going to need to cut our own strips.
If you have access to a planer now would be a good to to run your boards through it and get some nice sides to you 2 by 6 material. If not I recommend doing a light sanding now to get rid of any writing and scoff marks on your wood. I skipped this and really wish I had thought of this before ripping my wood down into slats.
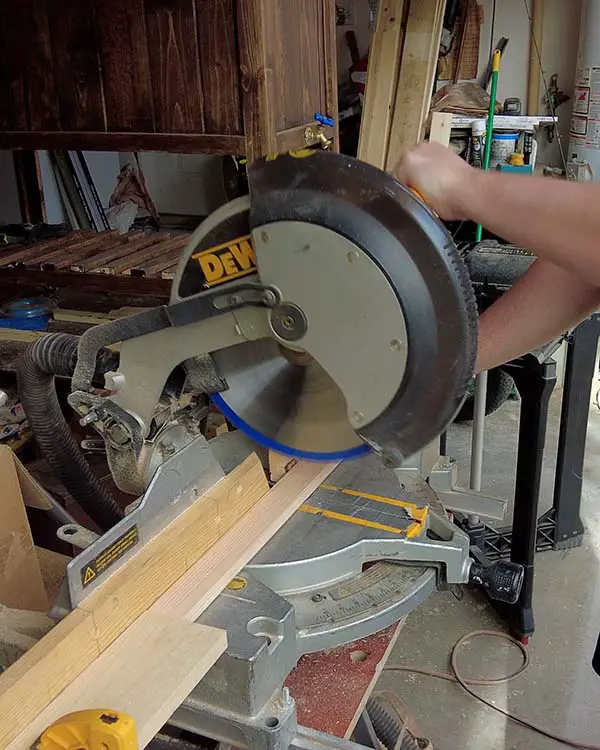
I cut my slats down to 3/4″ using a stable saw.
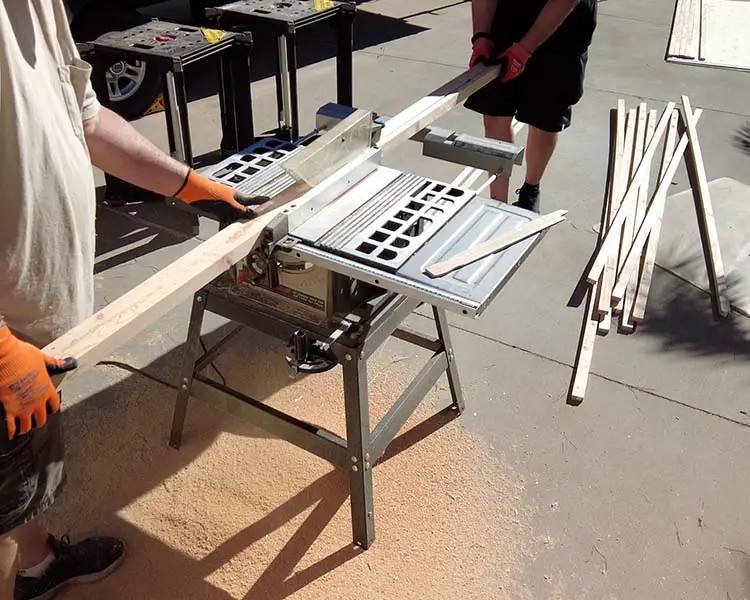
This can also be done with a circular saw and using your plywood as a straight edge but it will be more time consuming.
Important note: is that pieces came out to 3/4″ by 1.5″ because 2×6 material is actually 1.5″ by 5.5″. I was able to get 6 slats out of each 2×6.
FYI- For my double barn doors I ended up needing 12 long slats per door. That’s 24 slats for both doors. I needed to cut extra slats to chop down for the smaller slat pieces that go on the top and bottom. I also had some pieces that came out warped after they were cut (this happens so plan for it) and were unusable. In total I cut through 7 2×6, that’s 42 slats so I could pick out the best pieces to work with.
I then sent my slats through a planer, but you can smooth them out with sand paper.
Chop off the the ends of your slats so they are 1/2″ longer then you want your door. We are going to use these pieces you cut off as will, so set them aside while you make your cuts.
Once you are done cutting your long slats down. Take a few of your slats and cut the whole thing down to the same size as your cut off pieces.
Example: Each of my doors had 12 slats so, I need 22 smaller cut off pieces per door.
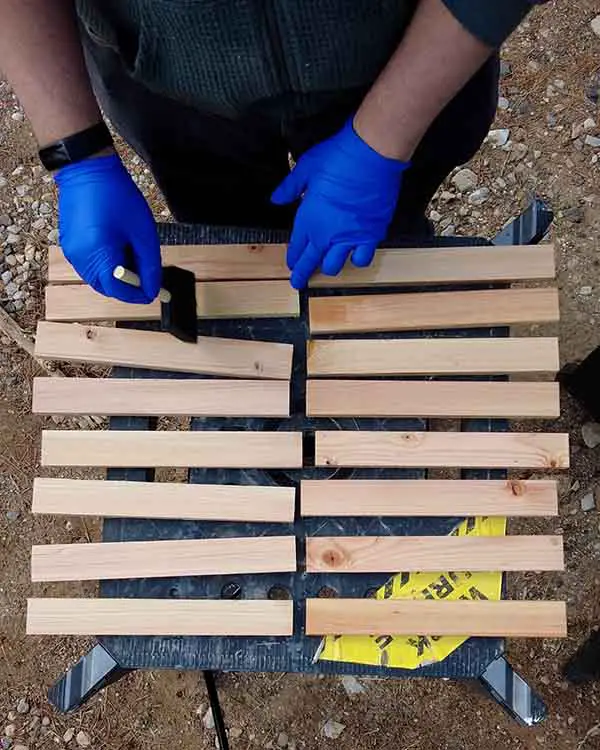
Laying Out Your Slats
Because we don’t want any partial slats it is best to lay out you slats over you plywood before you cut it. I found it easiest to do it this way and was flexible with what the width over my door could be.
I had a minimum width but if it was slightly wider it would be no problem.
If you want an exact door wood width I would recommend cutting all of your top and bottom spacer slats to a uniform size that will get you the exact width you want.
Mark out where you need to make your cuts on your plywood so all your slats are supported.
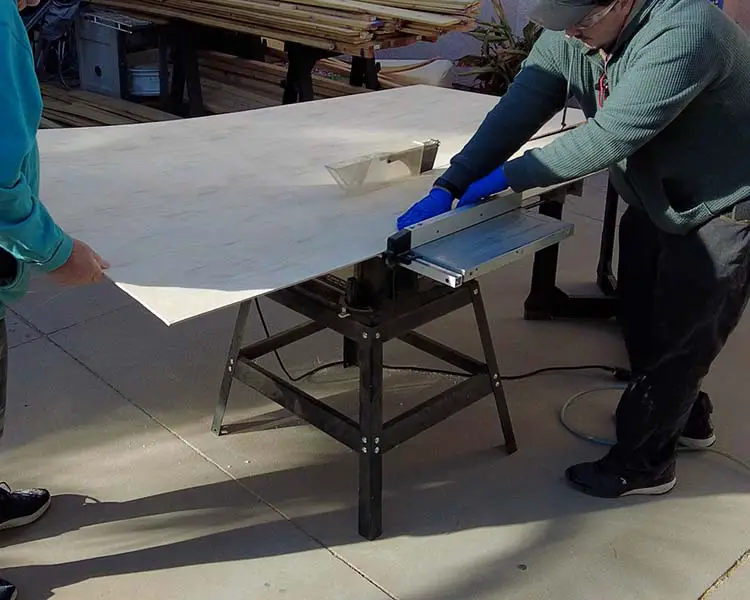
Cutting Your Plywood
For the bottom I clamped a 4ft ruler down as a straight edge and cut the plywood using a circular saw.
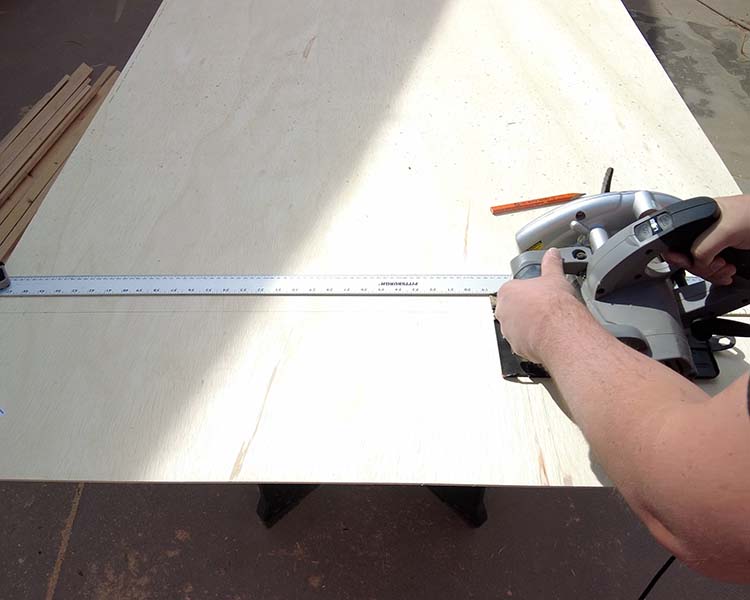
For the long side I used the table saw.
Note, If I had been by myself I would have used the circular saw to cut the long side of the plywood and used the other sheet of plywood to give me a straight edge.
Sanding and Staining Your Wood Slats
At this point sand your slats to a give them a smooth feel. I only went up to 120 but 220 may have been better.
Apply your stain to your slats and let them dry. I used “Natural” Stain wood stain for my slats. Note, If you you decide to use a common board for your build this stain did nothing for that type of wood when I tried it out on it.
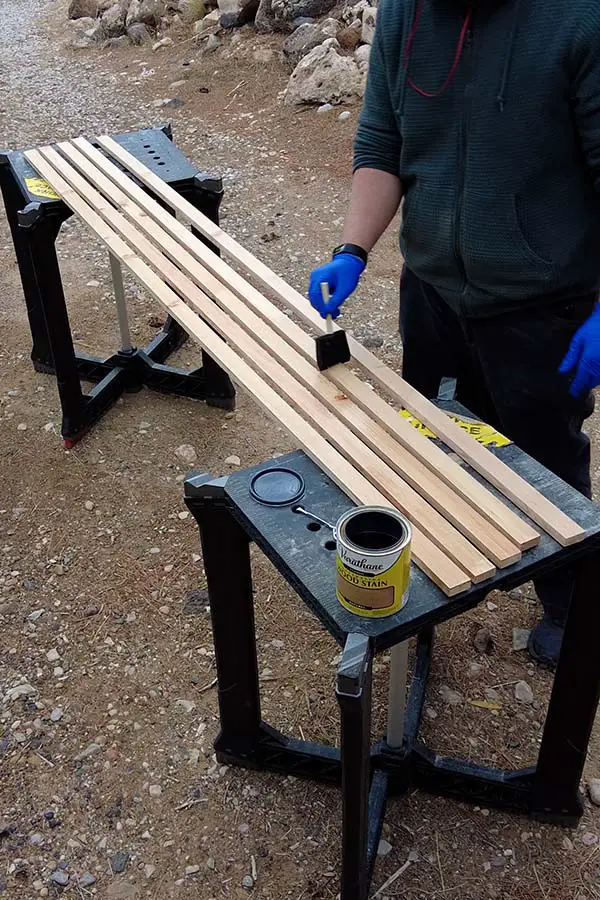
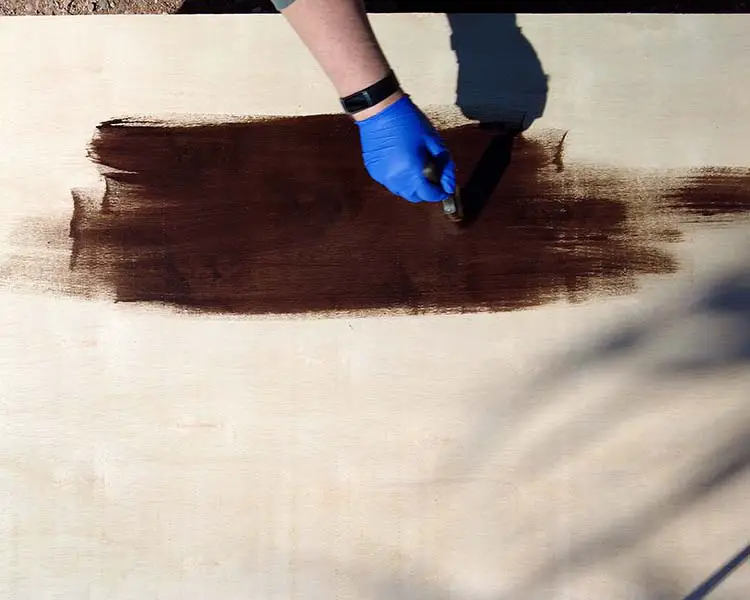
Apply you stain to your Plywood at this point as well and let dry. I used “Early American” Stain for my plywood.
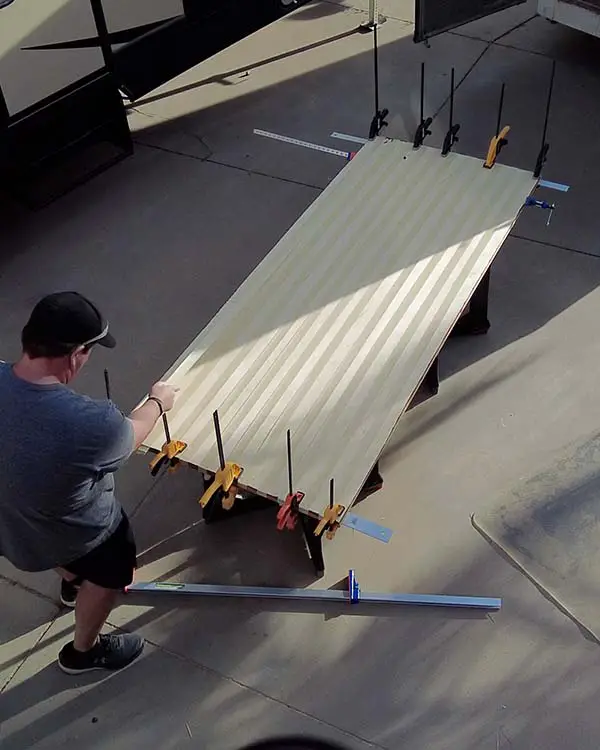
Gluing Your Wood Slat Barn Doors Together
I would do a dry run now of how you are going to glue all you pieces together. Make sure you are using you best slats and everything is lining up.
Make sure you have small clamps and large clamps, or heavy weights and a method of keeping the doors square(If gluing on ground).
What I did is apply my glue to all of my pieces and then quickly put them into place.

Using all the clamps I could find and some 4ft rulers, I clamped down one door at a time.

Note, one of the doors I over clamped and it created a slight bow in the door. So, don’t over do the clamping pressure.
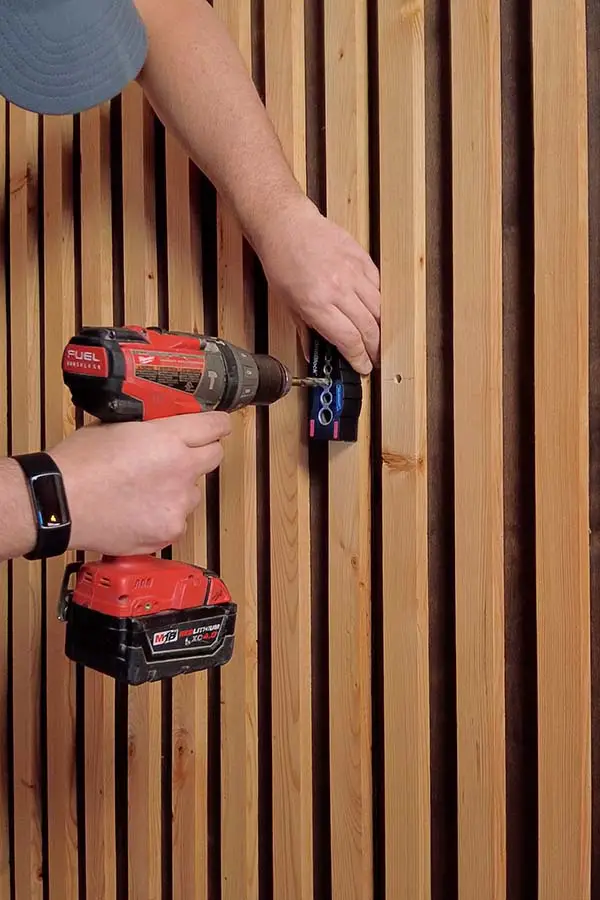
Adding Brad Nails
For extra support I added brad nails. after the doors had a little time to dry, I flipped the over the doors and marked out the empty spaces it masking tape.
I was then able to clearly see every where I need to put brad nails going down the long slats.
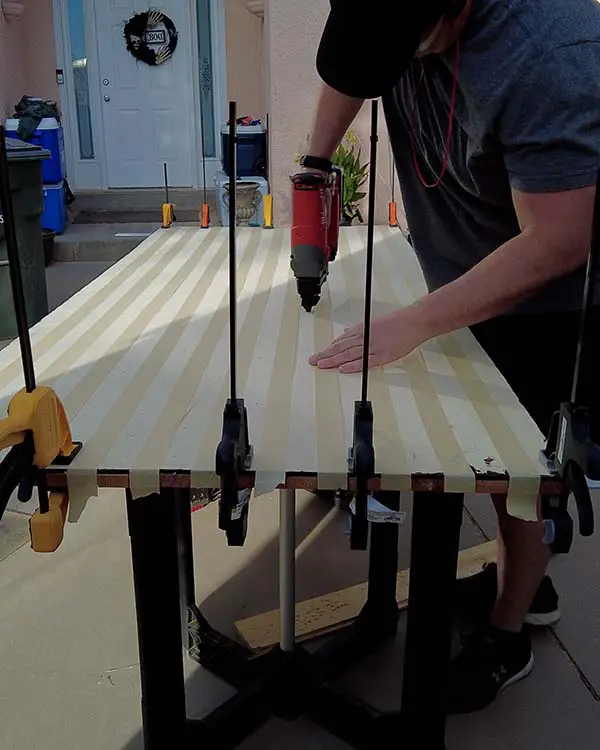
After the long slats had been brad nailed I ripped off the tape and added brad nails to the smaller top and bottom slats.
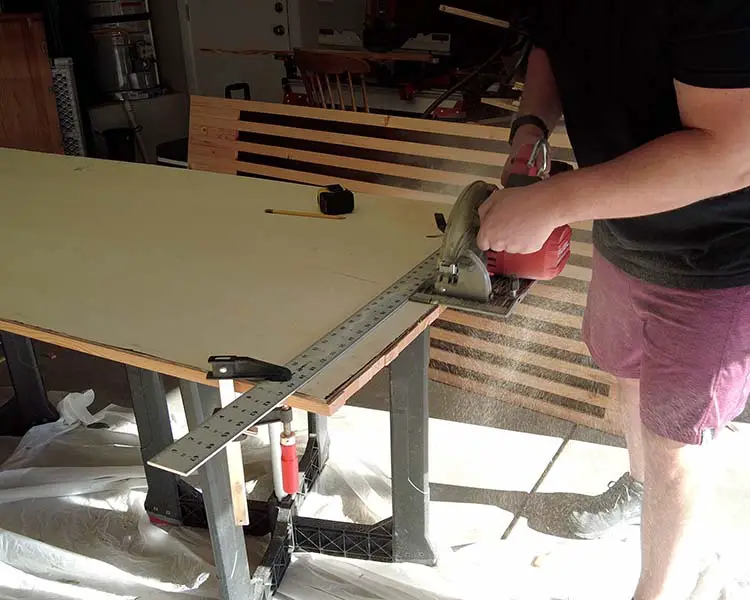
Cutting Your Barn Doors To Final Height
Once your glue is dry and everything is nailed down you can do your final cut on your doors. This final cut will give you a straight edge on the top and bottom of your doors.
Clamping down a 4ft ruler as a guide take your circular saw and cut off 1/4″ on both side of your doors.
How To Install Your Barn Doors Over Existing Door Trim
Because we are replacing our old double door that already have trim, we opted for installing a wood support backing. This would bump out the doors a little further so they wouldn’t end up knocking into our preexisting trim.
We also ran into the problem that our rail did not line up with any of our studs, so adding a support backing seemed like a really good idea. Especially, when compared to using only the anchors that came with our barn door rail kit.
Here is a quick over view of the steps we took
- Mark out studs
- Cut board to length
- Mark out studs on the board
- Counter sink and then pilot holes
- Paint board to match
- Install board using a long level
- Mark rail line on board using a level
- Install barn door rail using a level
- Measure and install wheels on door
- Hang barn doors
- Add final hardware
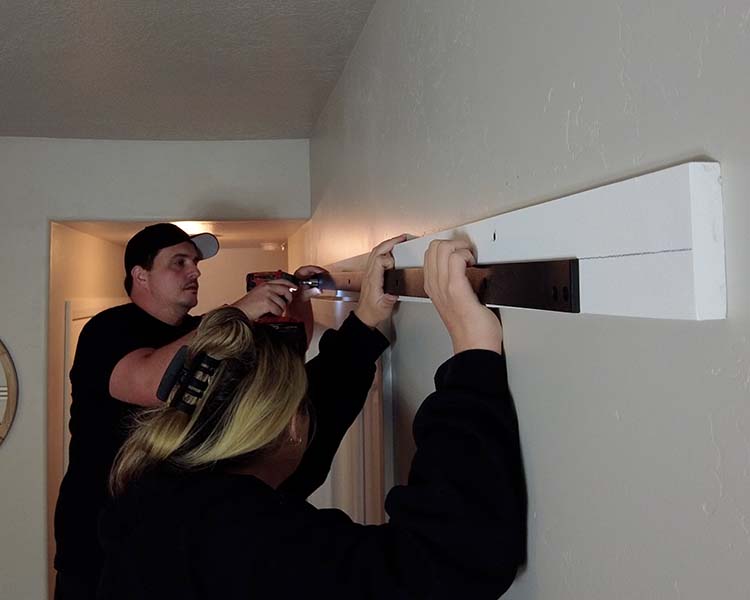
Find Studs In Wall
using a stud finder, mark out your studs. I find it helpful to mark studs with painters tape. It makes the studs locations very visible and you can follow the studs down in straight lines. It is always annoying when you can see where your studs are because you have to cover up your marking when doing an install.

Cut Support Board to Length
Measure how long your rail is going to be, then cut your board at least 4″ longer then the rail. This will give you enough wood for your rail to screw into. Remember to also cut your board long enough to reach the studs you and to drill into.
Because we are doing double doors, we chose to buy buy a 12ft piece off common board and then cut it down. You can do this using 2 boards, but it is more difficult to hide the seam.
Mark Studs On Support Board and Drill Holes
Mark center on your board, and center above your door. Line up the markings and then mark out your studs on the board and where you want to drill your holes.
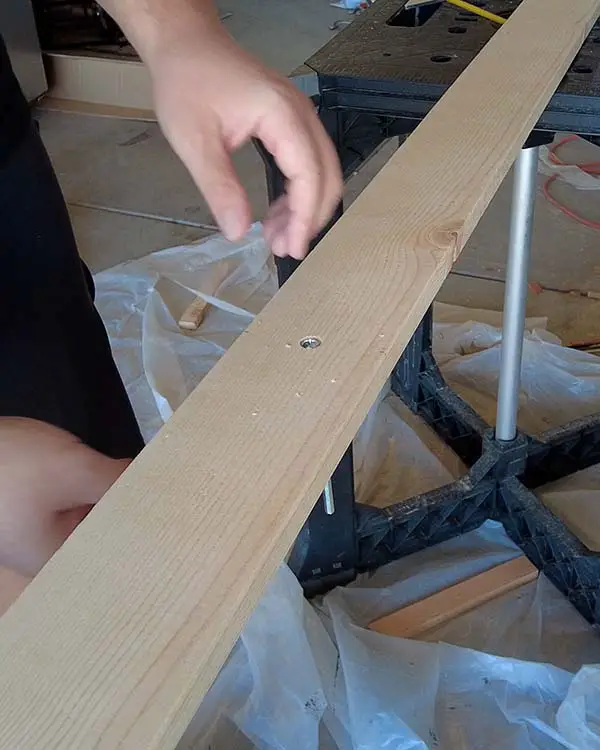
Using a Fostner bit or a counter sink bit, drill out your holes.
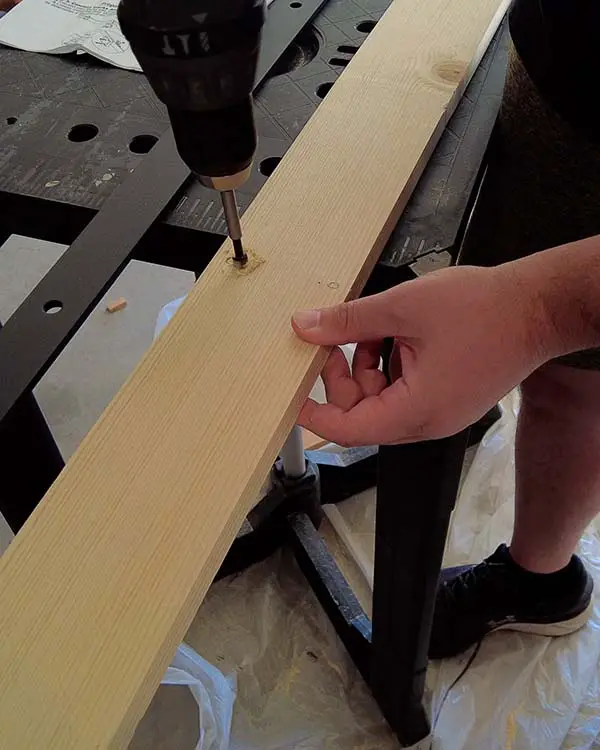
Note, Once the board is installed you and can fill in these holes and paint over them to conceal your screws. We did not do this because if we want to make a change in the future, I would like to be able to find the screws.
Paint And Install Board
We painted our board to match our trim and baseboards, but you can stain and match this board to your doors if you like. Just note that the stain you used on your slats will most likely not match exactly because of the different wood types.
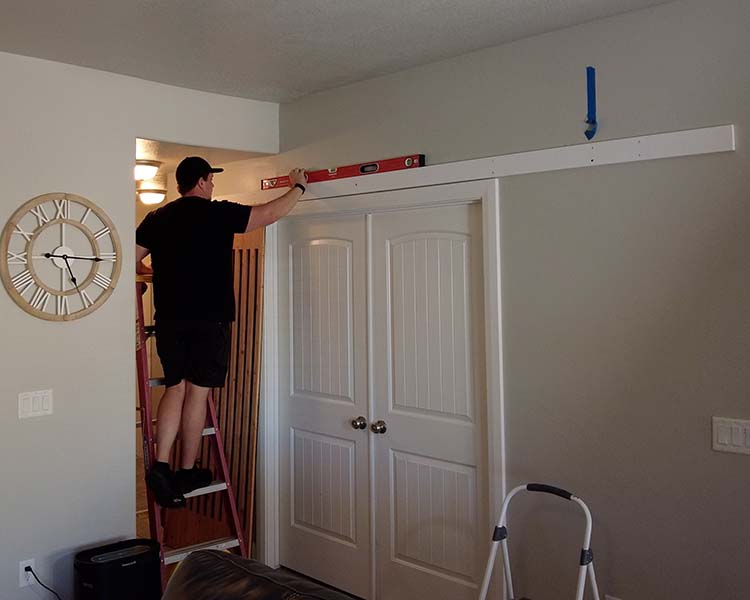
Center Your Board over your door way and screw it into the wall using long wood screws. I used 2 1/2″ screws for this. We also left a half inch gap above the pre existing door frame when we installed.
Remember to use a level when installing
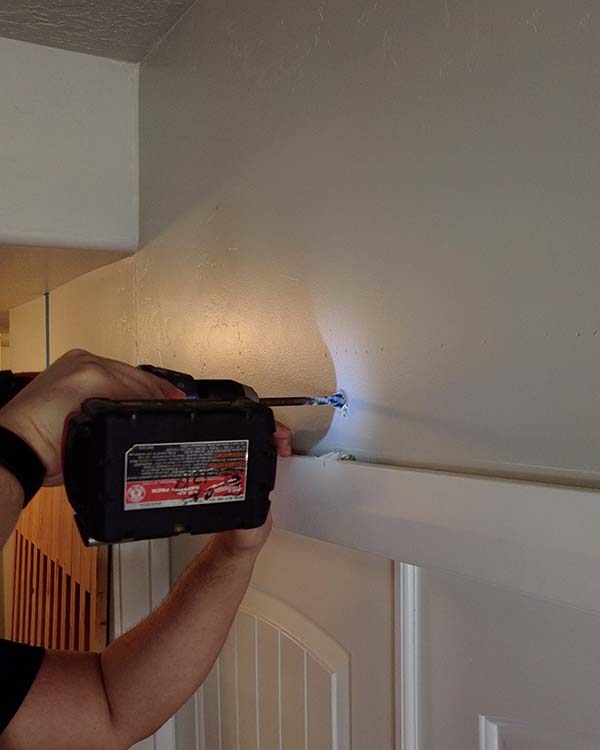
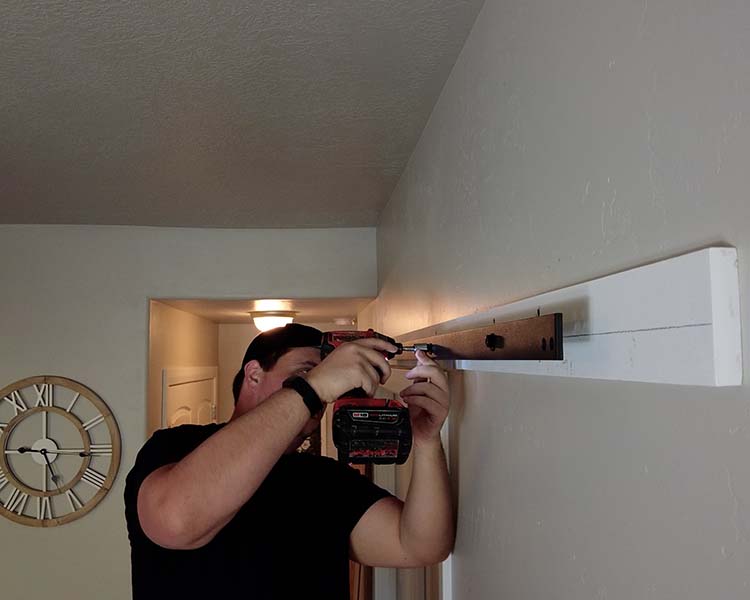
We also did not have any studs to screw to directly over our door. Some houses will put a header board on only one side over a door frame. To give support in the middle we used a toggle bolt.
For the toggle bolt we marked center on the board, and followed the same counter sink steps for the screws.
The main difference is we need to drill out a hole for the toggle in the wall.
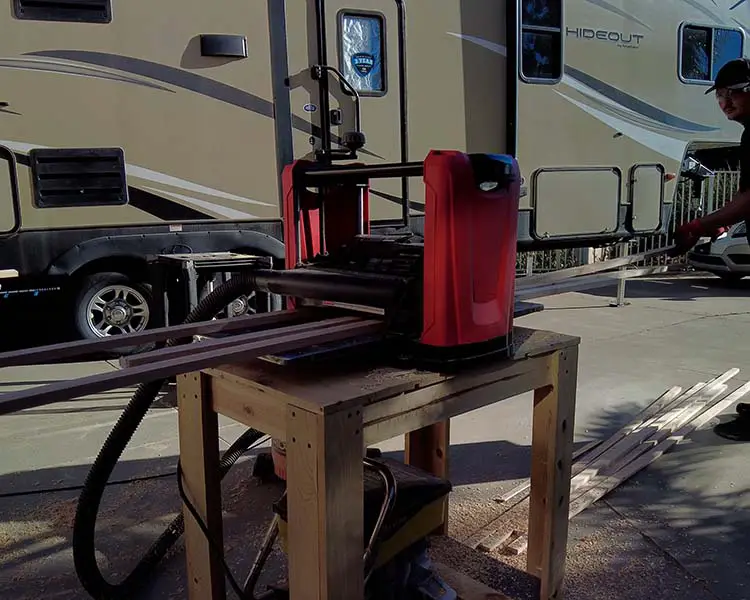
Installing Barn Door Railing
To make things easy to line up, we marked a line going down the center of the entire board. Note, if you di this you will need to come back through and get rid of the mark with a easer and/or touch up paint.
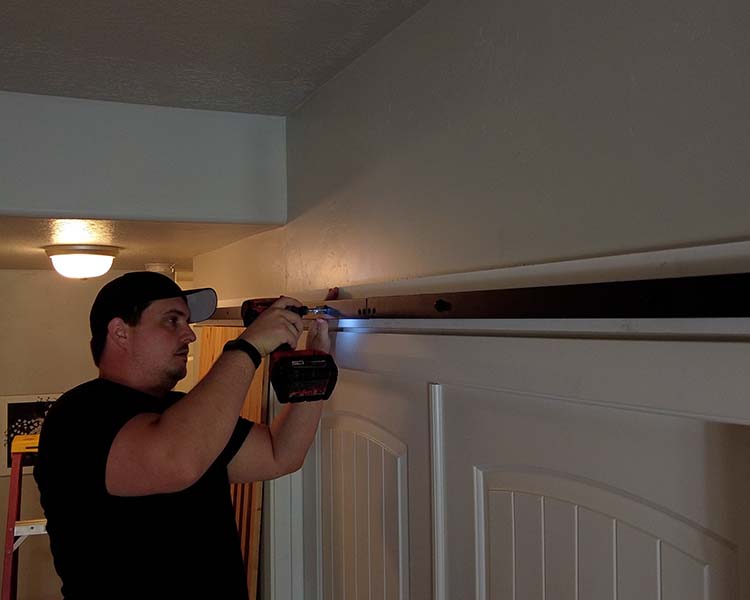
Install one side of your rail first, then you can swing it up to do the other side.
Note, the instruction said to attach both rails together before install, but that was supper flimsy. It was much easier to install one half at a time.
After both ends have been installed you can install the lag bolts in the middle.
Repeat the process for both rails (if putting up double doors). Make sure to use a level the whole time and line up both rails exactly.
Attaching Wheels and Hanging Doors
Follow the directions in tour kit for the exact whole placement and mark it out. It is good idea at this time to hold the door up and make sure that with the kits wheel instruction you are happy with the gap on the bottom. Make Adjustments if necessary.
Note, we bought floor roller kit to keep the doors on track, but the gap left from following the instructions did not leave enough clearance. We will have to take the doors off in the future and cut a small amount on the bottom (using the same method as “cutting barn doors to final height step”) in order to install these rollers.
Adding Final Hardware
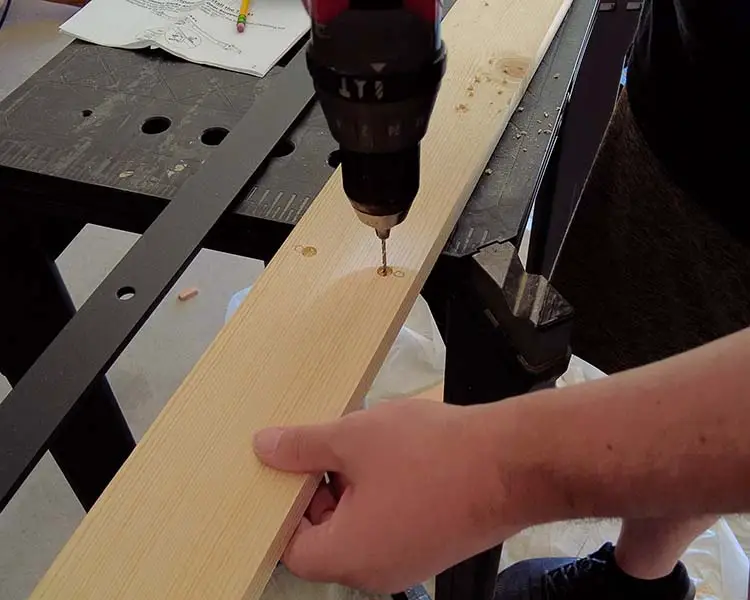
Mark where you want your handles to go, and pre drill your holes. I recommend using a drill block for getting straight holes.
Like stated above we are going to add rollers in the future, but for now we are leaving it. We will install those when we finish the back of the doors.
If you were wondering, we plan on covering the back of these doors with vinyl flooring and adding trim around the edges. That is a future project however.
For now we will enjoy our new barn doors.