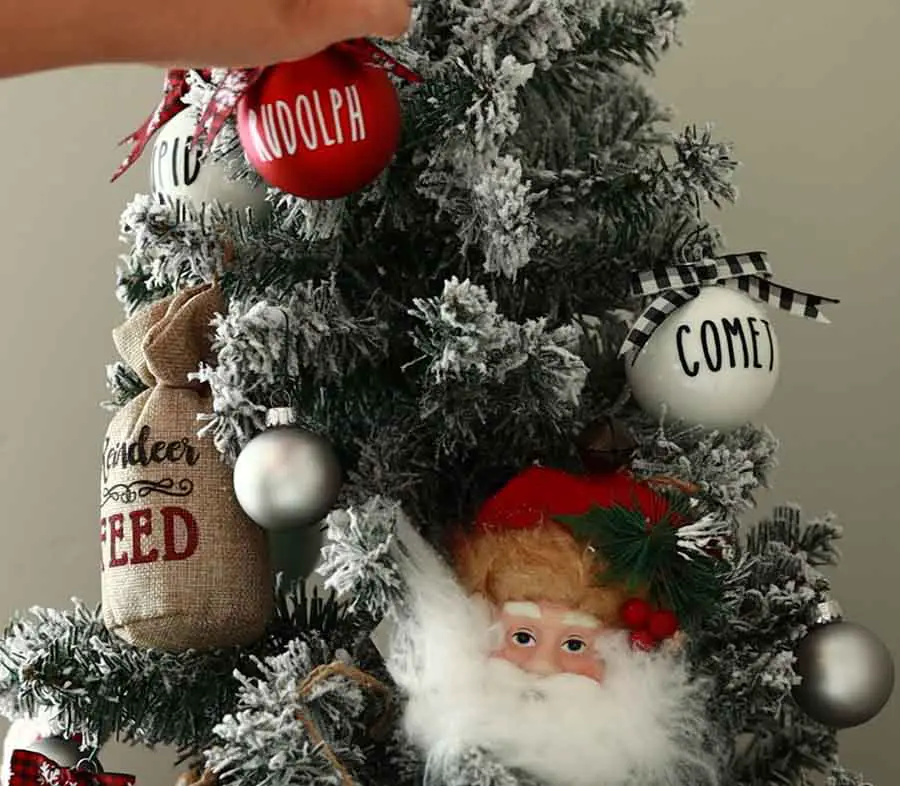
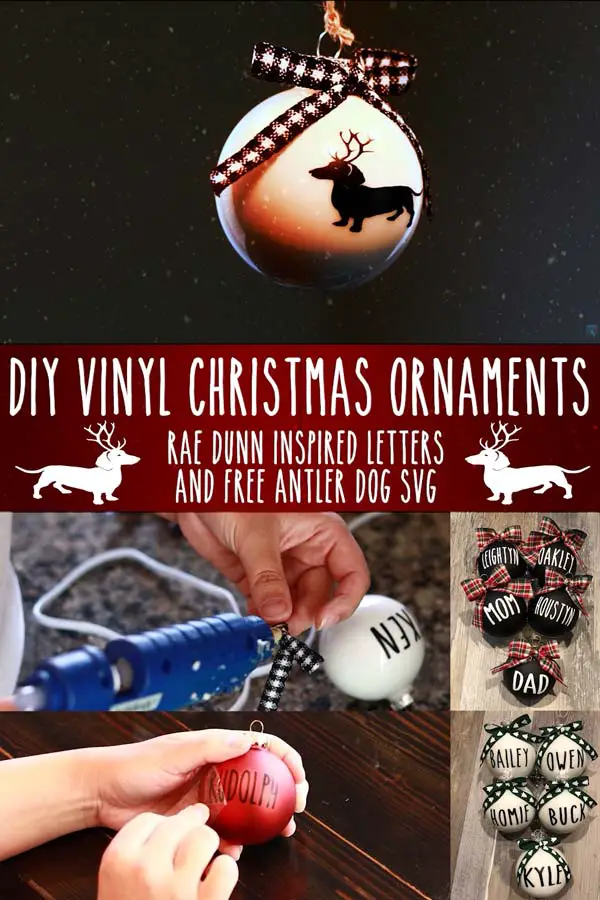
I know it’s only May when I’m writing this, but it is never too early for Christmas in my book! If you personally know me, then you know how much I LOVE Christmas and RAE DUNN! Most probably cringe when Hobby Lobby starts putting out their Christmas Decor in the Summer, but my heart does a little happy dance when I see it. These Rae Dunn inspired ornaments were a huge hit for me last year, so I decided to make an easy tutorial for you to make your own. I also added a cute image of a Dachshund dog with Reindeer antlers, you can download this for free in my shop. Happy Crafting!
Ornament Supplies
- Christmas Ornaments (Color of your choice, I used red and white from Hobby Lobby, Don’t forget to use a 40% coupon)
- Bows for ornaments (pattern of your choice, I get my ribbon from Michael’s, Joann’s, and Hobby Lobby)
- The Skinny Font (Bold) (You can download this font from Dafont.com)
- Permanent Vinyl for your words (I use Oracle 651 from Michaels)
- Transfer Tape of your choice (I use Regular Strength Cricut brand)
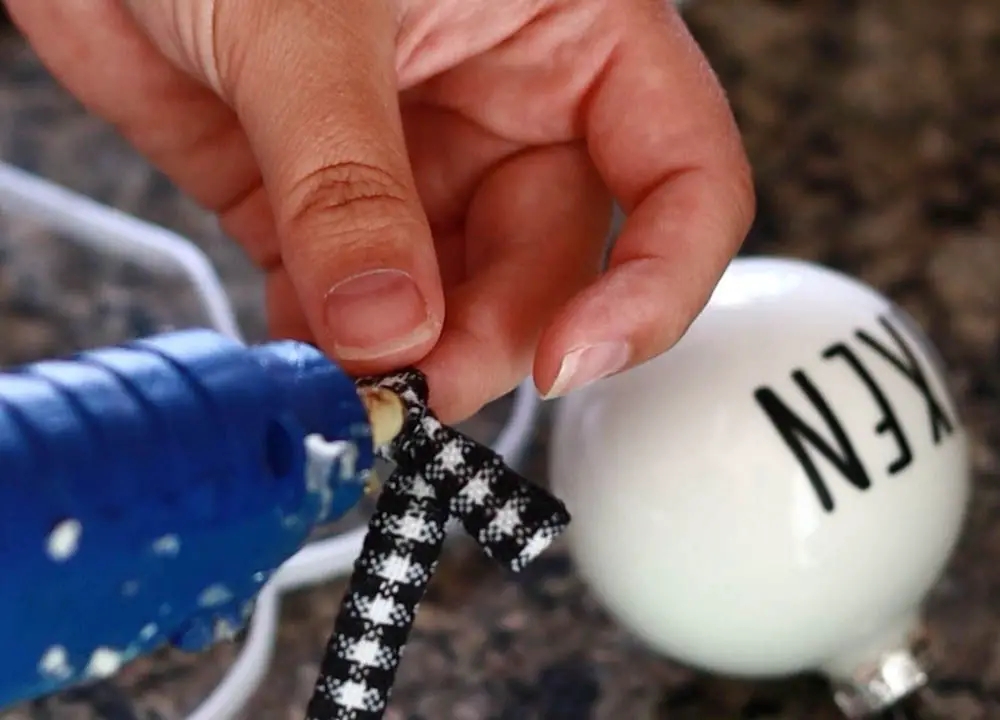
- Hot glue
- Rubbing Alcohol to clean fingerprints and debris off your ornaments
- Scissors
- Weeding Tool
- Squeegee Tool
- Cut Machine (I used my Cricut Explore Air2)
How To Make
Step 1- Download my free SVG Dachsund dog wearing reindeer antlers from my shop

Step 2- Go onto Dafont.com and download the font called “The Skinny” (I used Bold since it is easier to weed).
Step 3- Now that your font is installed, open up your Cricut Design Space or or program of choice.
Step 4- Type out your words. I did each of the Reindeer names, but I did these ornaments with family names this past year, and they were a big hit!

Step 5- Once your words are typed out, you will want to make sure that the measurement’s for each words are 2″ wide x 0.9″ tall. I found that these measurement’s look the best on the ornaments with this font.
Step 6- Resize your Dachsund SVG to 2″ wide x 0.9″ tall.
Step 7- You are now ready to cut your words and image out onto your permanent vinyl.
Step 8- Weed out your words and SVG.
Step 9- Take your transfer tape, and cut out a piece to fit over the top of each word, and squeegie it over the top so that it is adhered well to the transfer tape.
Step 10- Grab a cotton ball or paper towel, and put some rubbing alcohol onto it and wipe your ornaments to remove the fingerprints or any debris on them and let dry.
Step 11- Once your ornaments are clean and dry, you can now transfer the words onto them.
I like to gently place the word onto my ornaments and work my way side to side gently pushing the entire time each letter down so that they do not get air bubble or wrinkle. This will take some patience, but I found that this method works the best.

Step 12- Once all your words are onto the ornaments, it’s now time to hot glue your bow of choice. I hot glue my bows right below the hook and above each word right onto the ornament.
Step 13- TIME TO DECORATE!