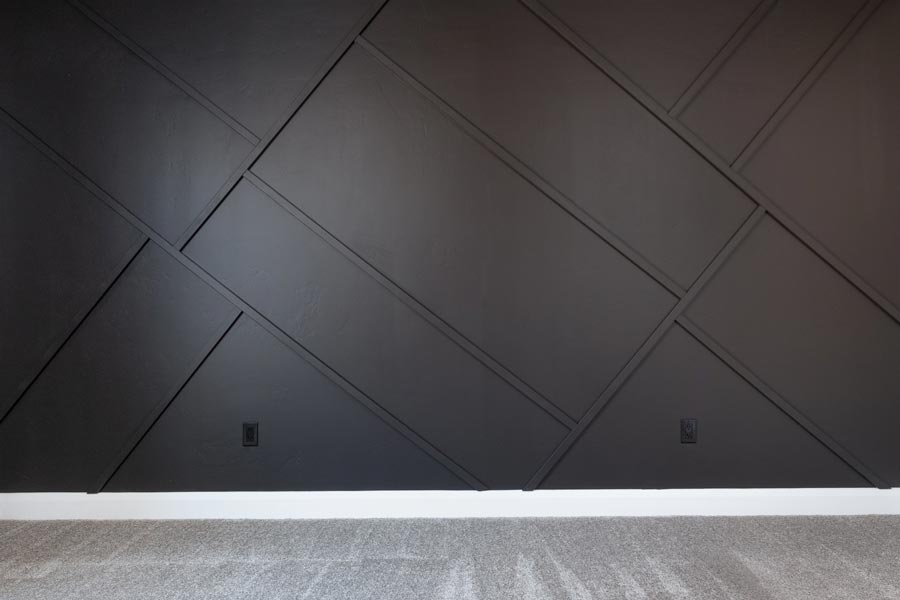
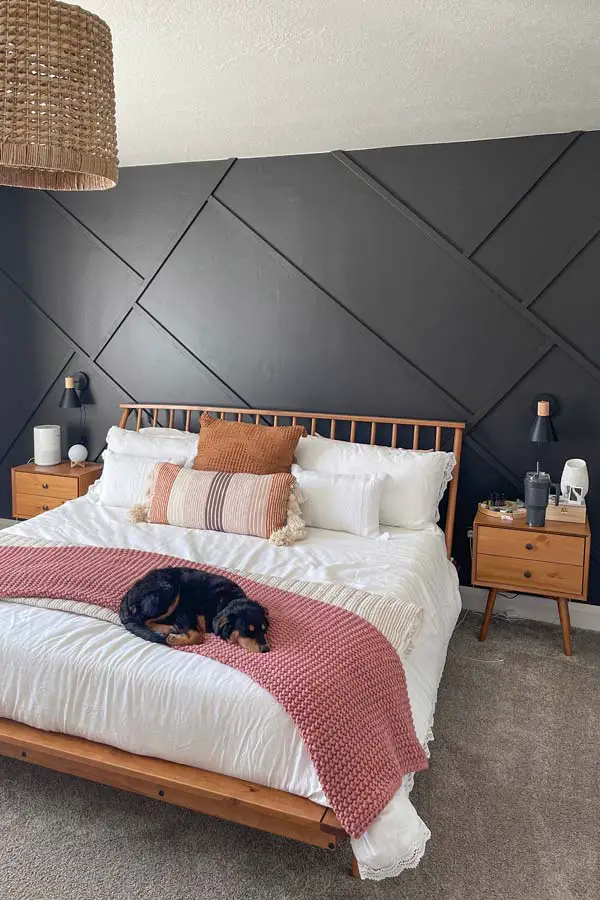
I. AM. OBSESSED with our new wall and bedroom makeover! I have seen so many of these wall designs and knew I needed one! I wanted to switch our bedroom to a completely different style so we went with a modern boho look! At first I was a little worried doing a black wall for this space, but I quickly fell in love with it. It adds such a good modern vibe to this room! Down below is a step by step guide on how to easily build an accent wall with a geometric design
Tools and supplies
- Painters tape
- Painters paper
- Plastic drop cloth
- Paint roller
- Paint brush
- Foam paint brush
- Paint
- 1×2 mdf trim pieces
- Miter saw
- Stud finder
- Brad nailer
- 2 inch brad nails
- Caulking tool
- Wood filler
- Liquid nails
- Level (You can download and use an app for a level on your smart phone for odd angles)
Painting The Wall
To prep your wall, tape around all your corners so you can get a straight edge. Depending on the method of painting you are using, you may want to add more protection to your other walls. For us, we used painters paper for the side walls, several layers of painters tape for the ceiling, and a plastic drop cloth for the floor.
To start painting, take your paint brush (not roller) and start painting around the outside edges.

Before the paint dries, use your roller and paint the wall. If you are painting alone, you will want to either work quickly or break your painting into 2 different sections left and right. A little hack, use a broom handle to screw to your paint roller, this way you don’t have to buy a painters stick.
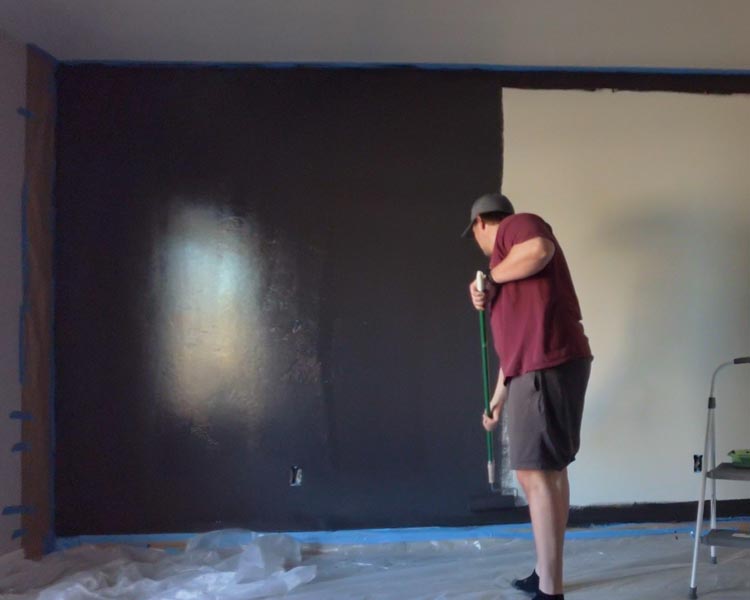
Let your wall dry then apply another coat for better coverage.
Paint The Trim
For our design we purchased pieces of pre primed trim. We used foam brushes and painted them out in the garage before cutting and bringing them in to put on the wall. We did this so we didn’t have to deal with painting in a ton of cracks and crevasses.
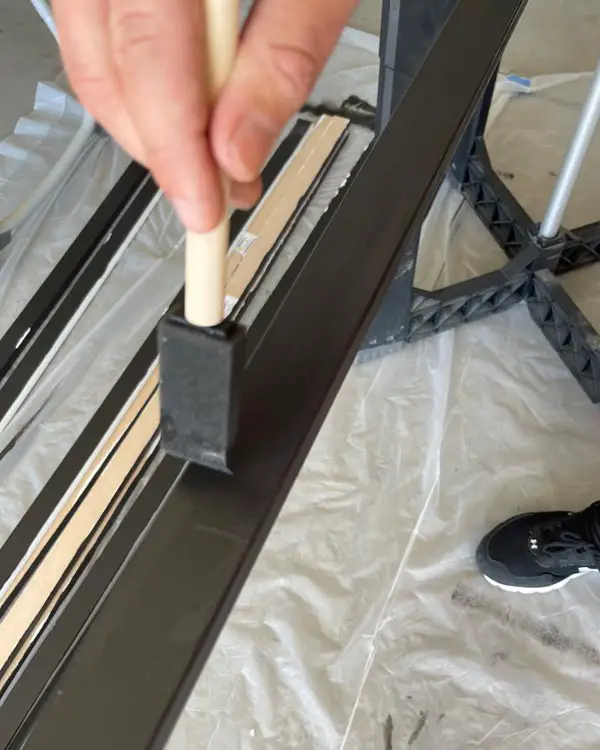
*Note If I had to do this project again, I would consider putting my trim pieces up on my wall and then painting them with a sprayer.
Mark the design on wall
Find your studs and mark them out using blue tape.
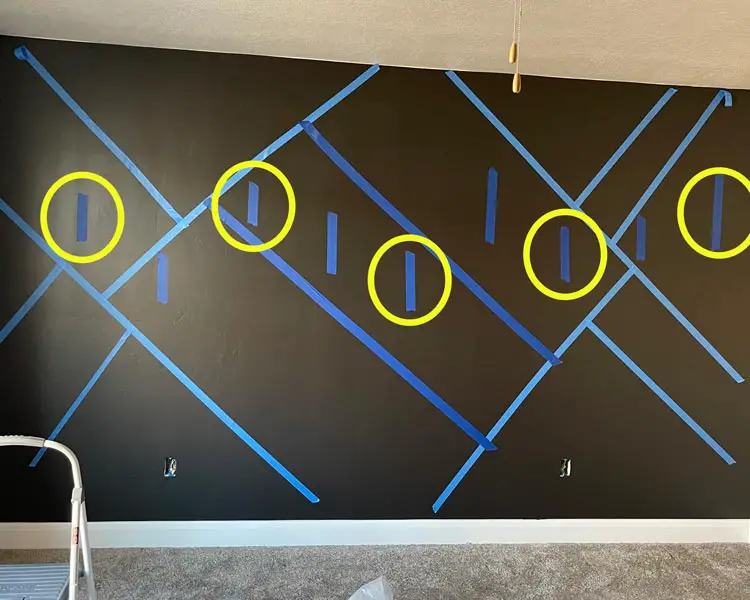
Using your blue tape mark out your design on the wall. Using a 45 degree angle for you pieces will make your cuts easier.
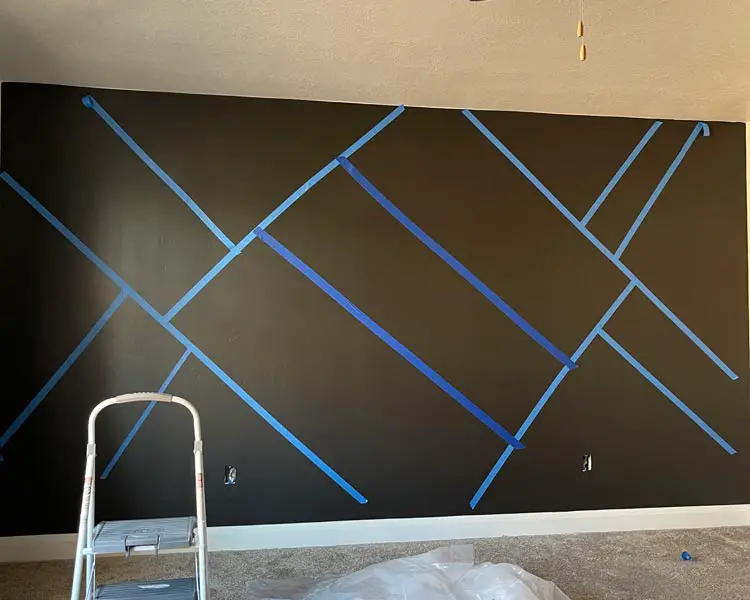
I recommend that every trim piece that you put up crosses at least two studs. This will make sure pieces are easy to put up and are secure to the wall. We modified our design after we got it up on the wall to make sure every piece crossed two studs.
Cut and place
Measure out your pieces on the wall. Then using a miter saw, cut them at 45 degree angles.
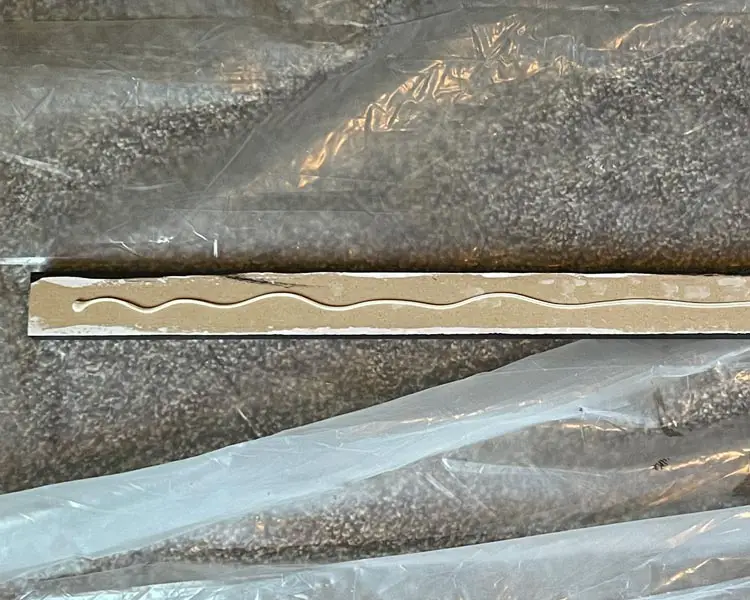
Add liquid nails to the back of your trim (if you are crossing two stud this may not be necessary but we did it anyway to make the pieces stick better and flatter to the wall.) apply a thin line in a zig zag pattern.
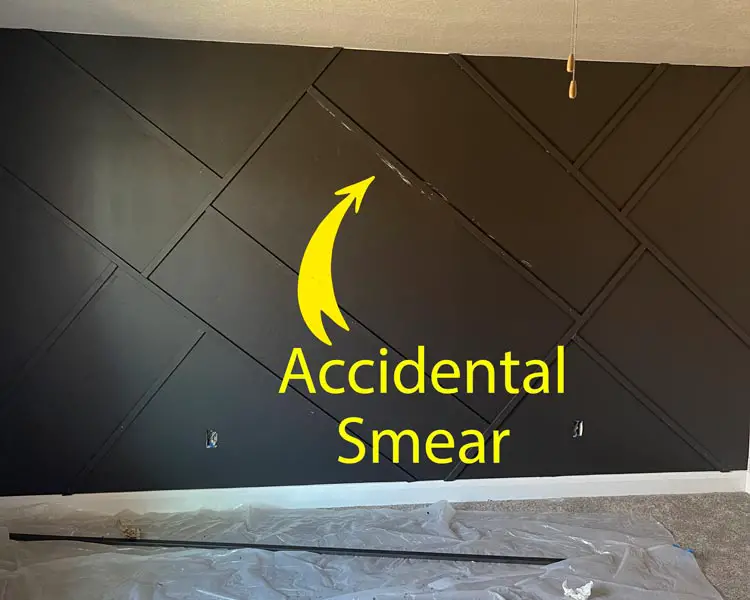
Pull off the blue tape, and carefully place your trim on the wall, avoid smearing liquid nails on the wall. (if you do wipe it off soon as possible, another reason why you should consider painting after putting up your design.)
Take your brad nailer and put in 2″ nails in over the areas that have studs. We nailed twice into each stud, staggering the nails slightly to make sure that at least one nail was firmly in the stud.
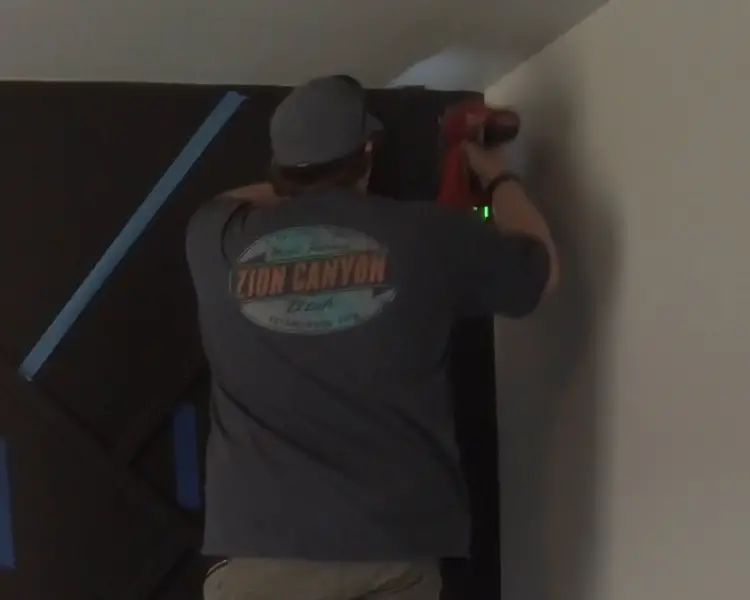
We made a mistake on the first piece we put up (because we weren’t using a level) and it was at 40 degrees! So for the rest of the design we had to make cuts at 40 degrees and 50 degrees. This made the whole process more confusing. SO MAKE SURE YOU USE A LEVEL THAT HAS 45 Degrees. You can also use your smart phone. We downloaded an app called Angle Pro to do the rest of our pieces, and we definitely needed it because every piece after that needed to be placed at the odd angles of 40 and 50.
Touch Up and Finishing Touches
If you have deep holes from your brad nailer, you can use wood filler to fill them in.
Go over any scratches or holes with paint to conceal them.
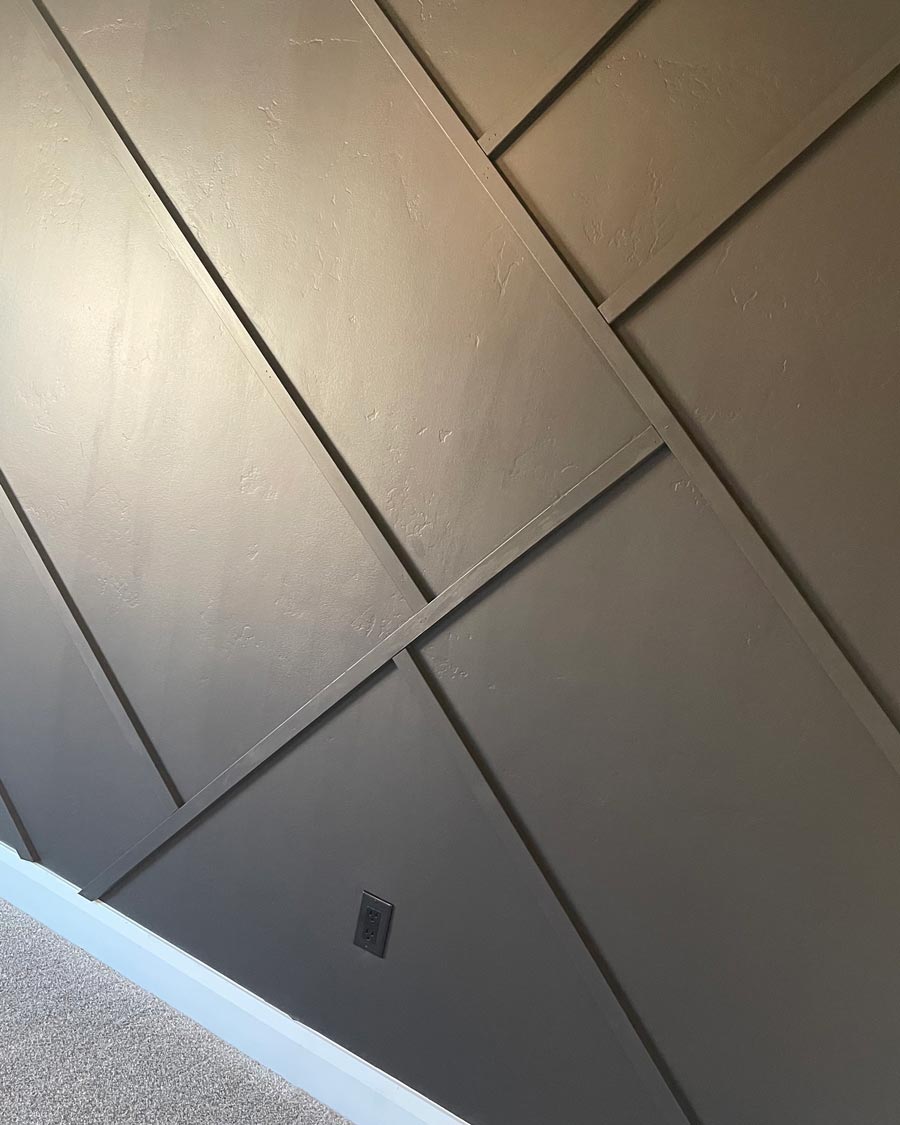
Put back on outlets that you have painted, or buy a color of outlet that will blend well with your wall (that is what we did).
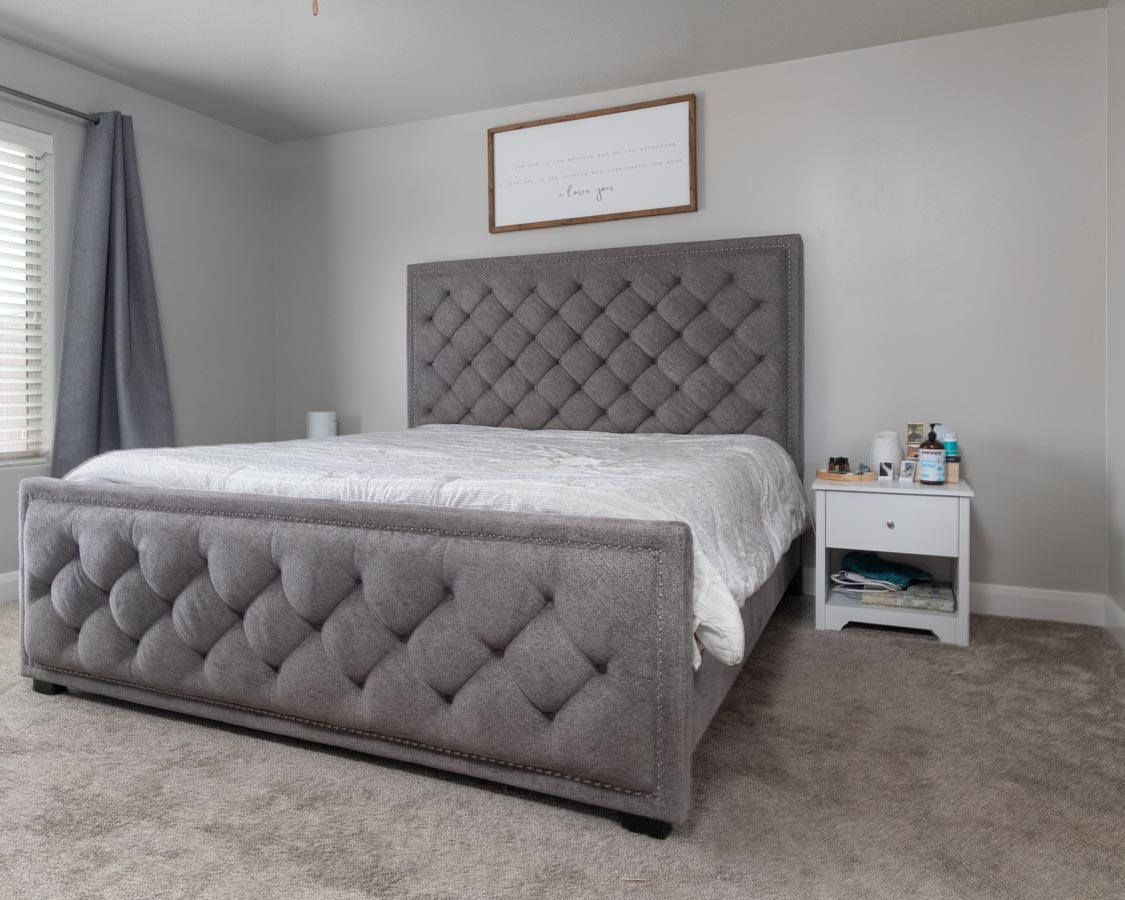
Here is our bedroom all complete! Like I said, OBSESSED!!!!
Here is the before picture